Summary
In this article, we described the surgery procedure and handling tips for implantation of ultra-thin polyimide-based microelectrode array (PBM-array) on the mouse skull for acquisition of high-density encephalography (EEG) in a mouse model.
Abstract
Electroencephalogram (EEG) indicates the averaged electrical activity of the neuronal populations on a large-scale level. It is widely utilized as a noninvasive brain monitoring tool in cognitive neuroscience as well as a diagnostic tool for epilepsy and sleep disorders in neurology. However, the underlying mechanism of EEG rhythm generation is still under the veil. Recently introduced polyimide-based microelectrode (PBM-array) for high resolution mouse EEG1 is one of the trials to answer the neurophysiological questions on EEG signals based on a rich genetic resource that the mouse model contains for the analysis of complex EEG generation process. This application of nanofabricated PBM-array to mouse skull is an efficient tool for collecting large-scale brain activity of transgenic mice and accommodates to identify the neural correlates to certain EEG rhythms in conjunction with behavior. However its ultra-thin thickness and bifurcated structure cause a trouble in handling and implantation of PBM-array. In the presented video, the preparation and surgery steps for the implantation of PBM-array on a mouse skull are described step by step. Handling and surgery tips to help researchers succeed in implantation are also provided.
Protocol
1. Summary
C57BL/6J - 129S4/SvJae hybrid mice (12~15 weeks old) are anesthetized with ketamine (120 mg/kg i.p.) and xylazine (6 mg/kg, i.p.) cocktail. Tail or toe pinching precedes the surgery to inspect the depth of anesthesia. The mouse is fixed by stereotaxic apparatus (David Kopf Instruments, Model 902, Calif, USA). The scalp is incised on the midline about 25 mm to expose the skull under the lidocaine treatment for pain reduction. Any debris on the skull is wiped off by saline-soaked cotton tips to enhance the adherence of the electrode to the skull. The bregma and lambda points are marked and set in the same horizontal plane. The polyimide based microelectrode array (PBM-array) is positioned so that its vertical midline meets the midline of the skull. The bregma point should be located at the middle of the 5th layer of the anterior of PBM-array. Two or three microscrews are used at the null space in the edge of skull to help secure the position of the electrode with dental cement. For propping the PBM-array connector, we position a strut on the middle of the head, and cover it with dental cement. After curing, the incised skin is sutured, and at least 5 days are given for recovery. During recovery, the mice are housed in individual cages with free access to food and water. After recovery, EEG recording is performed. Animal care, surgical, and recording procedures were in accordance with the guidelines for the Institutional Animal Care and Use Committee, following Act 1992 of the Korea Lab Animal Care Regulations and associated guidelines. The PBM-arrays in this manuscript were fabricated as described by Choi. et. al.1 Please contact the authors to use the same PBM-array in the video.
2. Procedure
- Prepare the sterilized surgical instruments and stereotaxic apparatus.
- Anesthetize the mouse with anesthesia (e.g., ketamine/xylazine with a dose of 120 and 60 mg/kg i.p., repectively). Tail or toe pinching precedes the surgery to inspect the depth of anesthesia.
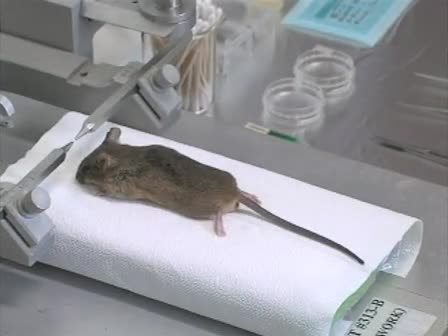
- Mount the mouse onto the stereotaxic apparatus by placing ear bars into the mouse's ear canal and tightening it in place. The eyes can be covered with biocompatible jelly (e.g., petroleum jelly) to keep the eyes from drying up by the surgery light. After moisturizing the mouse's head with 70% ethanol, shave the fur off its head.
- Incise the head about 25 mm with a scalp. It is recommendable to apply a little amount of 2% lidocaine hydrochloride under the scalp. Pinch the skin with micro clamps (Fine Science Tools (USA), Inc., 18052-03, Calif, USA) to keep the incision wide open.
- Wipe any remaining tissue debris on the skull with saline-soaked cotton swabs enhance adherence of the PBM-array to the skull. Using peroxide for removing the residue of the membrane is also effective.
- Find the bregma and lambda points on the skull, and mark them with an oil-based marker pen. Place the PBM-array so that its vertical midline meets the midline of the skull as shown in Figure 1. Position the bregma at the middle of the 5th layer of the anterior of PBM-array with one drop of tap water. Swab the film electrode from the medial to lateral carefully for better adherence. In order to help the film electrode stick tighter to the skull, the film electrode should be completely dry on the skull. The film electrode remains to be fixed on the skull by van der Waals force. When re-positioning the electrode, another drop of tap water is necessary to prevent the electrode from being torn.

Figure 1. (Left) A PBM-array on the mouse skull. The anterio-posterior axis of PBM-array matches the line between bregma (BP) and lambda points (LP). (Right) The putative electrode positions on the mouse brain surface. The anatomy of the mouse are segmented from the 3-D MRI digital atlas database of an adult C57BL/6J mouse brain produced in Brookhaven national lab and the electrode locations are marked according to the stereotaxic measurement. Ground (G) and reference (Ref) electrodes are marked in the right figure. - Mark at least three positions on the open area of the skull, and then make holes in those locations using a dental drill for the positioning of the supporting microscrews. These microscrews have a role of stanchion and mechanically support the dental cement on the skull. Extra caution is needed during drilling. Since the mouse skull consists of thin layers, hemorrhage can occur easily during drilling. When bleeding happens, stop drilling and apply small amount of hemostatic powder into the hole.
- Apply the dental acrylic cement (Vertex-Dental, Vertex Self-Curing, The Netherlands) to cover the PBM-array, anchor screws, and the rest of the skull. Prepare the dental cement in a gluey and viscous condition.
- Position a rigid stick as a strut on the middle of the head using strong glue (for example, Loctite, Henkel Loctite Corp, Dublin, Ireland). Put double-sided adhesive tape on the back of the connector plane. Manipulate the PBM-array connector position to connect with the tip of the strut. The vertical distance between the skull and the connector should be more than 5 mm. Stick the connector plane and the tip of the stick using strong glue for better adhesion.
- Make sure that the dental cement is completely cured. Then apply the dental acrylic cement over the skull and the backside of the connector plane to secure the connector to the skull.
- Remove the micro clamps. Suture incised skin with sterilized stitching fiber. Remove the mouse from the apparatus. You may apply extra dental acrylic cement to shield the exposed skull. Apply an antibiotic (fucidin ointment, Dong Wha Pharmacy, South Korea) around the cement and sutured skin.
- Place the mouse in a sterilized cage until it recovers its original body weight (approximately 5 to 7 days). It is recommended not to introduce any cage mates.
- After recovery, connect the mouse by a light-weight printed circuit board (PCB) connector to the headbox of a multichannel EEG amplifier system (Synamps2, North Carolina, USA) in its own cage. The connecting lines should be treated carefully so it does not get tangled.
- After 1 hour of habituation, perform EEG recording. Scan 4.4. (North Carolina, USA) acquisition software was used in this experiment. A typical time trace set of mouse EEG is shown in Figure 2. It is recommended to log the video to relate the behavior of the mouse.
- Obtained signal can be analyzed by MATLAB (MathWorks, Natick, MA, USA) to produce the topographical brain map. Sample topographies of EEG power map of mouse brain are shown in Figure 3.

3. Representative Results
If above surgical procedures are correctly conducted, 40 channels mouse EEG recording will be successfully performed without bad channels. Following figures show the representative raw EEG traces and topographic maps.

Figure 2. A sample trace of EEG experiencing absence seizure induced by injection γ-butyrolactone (GBL, 50mg/kg, i.p.). Red bar indicates spike-wave and discharges (SWDs) during absence seizure. The horizontal and vertical axes indicate time and voltage, respectively. The number follows the channel montage defined in Figure. 1 (right).

Figure 3. The topographic maps indicate the 2-6 Hz power distribution. The value in the colorbar represents the color scale of power map. During spike-wave and discharges (SWDs) induced by γ-butyrolactone (GBL, 50mg/kg, i.p.), the power in the large frontoparietal cortical regions significantly increase compared with the power before GBL injection (Baseline).
Discussion
Here we report surgical and recording procedures to acquire high-density EEG in freely moving mice. This method enables us to obtain functional brain maps from mouse model to study molecular mechanisms of spontaneous rhythmic1,2 or event related brain activities.
Acquisition of all the channels in the PBM-array is a necessary condition to obtain whole brain mapping, however making a secure contact for every channel is very challenging. To maintain consistent contact of the channel to the skull, the following procedures are found to be important. First of all, any tissue debris on the skull may set apart the electrode from the skull. Hence it is very important to remove all the tissue debris with sterilized cotton swabs and dry up the skull surface. Secondly, the ability of PBM-array which can stick to the skull surface is van der Waals force. It is suggested to apply a drop of tap water on the skull to build water layer before one apply PBM-array to the skull. Thirdly, the right viscosity of dental cement is very important. If it is too runny, it may build an insulating layer under the PBM-array. If it is too dense, the dental cement will easily fall apart from the skull due to its own weight. Lastly, at least three supporting microscrews should be implanted on the skull to make the dental cement tightly bound to the skull. The supporting microscrews hold up the dental cement and secure the headstage, which is essential for long-term study.
The application of PBM-array will be limited to chronic study with adult mice due to its size and weight. Based on our experience, mice heavier than 25 g are adequate to use. As further applications, through the null space between branches in our PBM-array, one may introduce secondary electrodes for recording or stimulation purpose.
Disclosures
No conflicts of interest declared.
Acknowledgments
Supported by KIST Grant (2E21510), National Honor Scientist program of the Ministry of Education, and the Original Technology Research Program for Brain Science through the National Research Foundation of Korea funded by the Ministry of Education, Science and Technology (2010-0018944).
Materials
| Name | Company | Catalog Number | Comments |
| γbutyrolactone | Sigma-Aldrich | H7629-500G |
References
- Choi, J. H., Koch, K. P., Poppendieck, W., Lee, M., Shin, H. S. High resolution Electroencephalography in Freely Moving Mice. J Neurophysiol. , Forthcoming.
- Lee, M., Shin, H. S., Choi, J. H. Simultaneous recording of brain activity and functional connectivity in the mouse brain. Conf Proc IEEE Eng Med Biol Soc. , 2934-2936 (2009).