1. Preparation of worms for imaging
- Preparing the agar pads
- Make 3 mL of 10% agar by dissolving molecular grade agar in M9 in a 13 mm x 100 mm glass culture tube and microwave for several seconds.
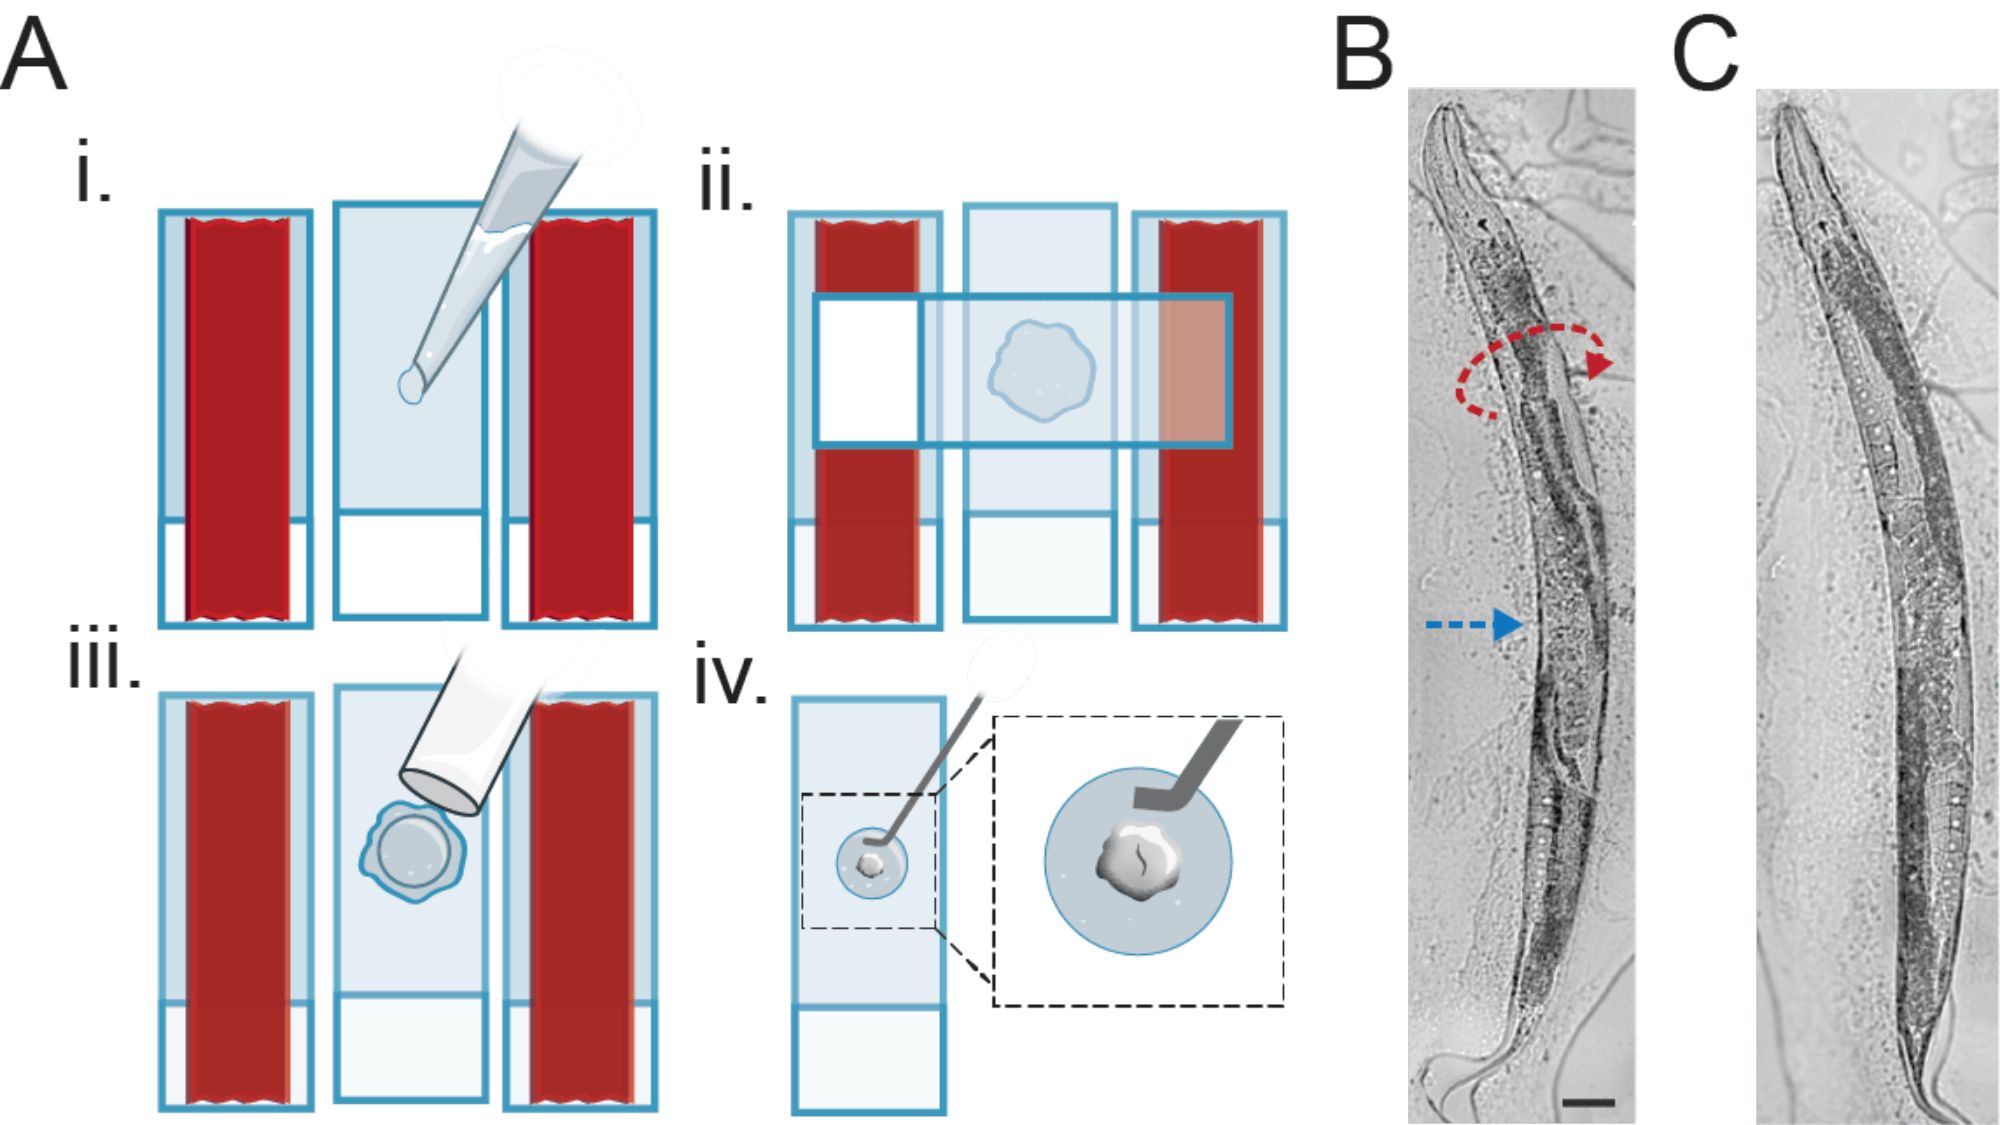
NOTE. Molten agar can be kept on a heat block for up to 1 h or can be made fresh each time agar pads are needed. - Place a microscope slide between two additional slides that each have two layers of laboratory tape (see Figure 1A-i).
- Cut the tip of a 1,000 μL pipette tip (without a filter) and use it to pipette a small drop of agar onto the center coverslip (Figure 1A-i).
- Flatten the agar by pressing another slide down on top of the agar (Figure 1A-ii).
- After cooling, cut the agar into a small disc using the opening of a 13 mm x 100 mm glass culture tube (Figure 1A-iii), and then remove the surrounding agar.
- Preparing the worm-rolling solution
- Dissolve muscimol powder in M9 to create a 30 mM stock. Separate into 50 μL aliquots, and store at 4 °C.
- Thaw a new aliquot of 30 mM muscimol every 3-5 days (and store at 20 °C while in use).
- Dilute a 30 mM muscimol stock in a 1:1 ratio with polystyrene beads to make the rolling solution.
- Positioning a worm for imaging
- Place 1.6 μL of the rolling solution onto the center of the agar pad.
NOTE: The amount of liquid should be adjusted for imaging younger (less) or older animals (more). - Using the preferred worm pick (i.e., a glass or platinum wire pick), transfer a worm of the desired age without the multi-vulva phenotype into the rolling solution on the agar pad (Figure 1A-iv).NOTE. The representative data are from 1-day-old hermaphrodites (GCaMP6f strain = FJH185; mitoGCaMP strain; FJH597), which can be identified by the presence of only one row of eggs.
- Wait for ~5 min for the muscimol to reduce the worm movement, and then drop a 22 mm x 22 mm coverslip on top of the agar pad, physically restricting the worm movement.
- For imaging neurites in the ventral nerve cord, roll the worm into the orientation shown in Figures 1B and 1C by lightly sliding the coverslip.
NOTE. To visualize the ventral nerve cord, position the worm with the head upward, and roll the worm until the intestine is on the right side of the proximal portion and the left for the distal portion of the worm (from the viewer's perspective). Invert this orientation (Figure 1C) for imaging neurites in the dorsal nerve cord.
- Mounting the worm on a microscope
- Place a drop of immersion oil onto the coverslip before mounting it onto the microscope stage.
- Find the worm using a low-magnification objective (10x) objective in brightfield.
- Switch to the 100x objective and adjust the focus.
- Locate the AVA neurite using the illumination of the GCaMP or mitoGCaMP with the 488 nm imaging laser.
NOTE: Use small adjustments to prevent squishing the worm or pulling off the coverslip.
2. Acquisition of high-resolution image streams
- In vivo GCaMP imaging
- Set the exposure time to 20 ms.
- Adjust the imaging laser and acquisition settings until the basal GCaMP fluorescence is in the mid-range of the camera's dynamic range. Refer to the discussion for suggestions on optimizing the imaging parameters using other microscopy setups.
NOTE: For the optical setup used in this study, set the 488 nm imaging laser to the following output settings: laser power = 50% and attenuation = 1. Modify the additional acquisition settings as follows: EM electron-multiplying) gain = 200 and pre-amplifier gain = 1. - After the AVA neurite is located using the GCaMP fluorescence at 100x magnification, set the Z-drift corrector (ZDC, see Table of Materials) to a range of ±30 μm, and initiate continuous autofocusing. Manually correct the focal plane as needed before imaging.
- Acquire a stream of images at 100x magnification. Durations as long as 10 min can be achieved with the setup used in this study.
- In vivo mitoGCaMP imaging
- Follow steps 2.1.1- 2.1.2 as needed to acquire the basal mitoGCaMP fluorescence in the mid-range for the camera's dynamic range.
NOTE. For the optical set-up used in this study, set the 488 nm imaging laser to the following output settings: laser power = 20% and attenuation = 10. Modify the acquisition settings to the following: EM gain = 100 and pre-amplifier gain = 2. - After the mitochondria in the AVA neurite are located using the mitoGCaMP fluorescence, set the ZDC as described above in step 2.3.
- Acquire a stream of images at 100x magnification.