This video demonstrates how to visualize and measure swarm avoidance behavior in Pseudomonas aeruginosa using a swarming agar plate assay. It shows the setup for time-lapse imaging under controlled conditions and explains how antibiotic-induced stress signals redirect bacterial movement, which is quantified through image analysis.
A subscription to JoVE is required to view this content. Sign in or start your free trial.
Method Article
Imaging and Quantifying Swarm Avoidance Responses to Antibiotic Stress in Pseudomonas aeruginosa
716 views
⸱
September 26th, 2025
In This Article
Abstract
Protocol
1. Image Acquisition with Scanner
- Decrease the ambient lighting of the Petri dishes by attaching black matte fabric to a rack 40–60 cm above the flatbed document scanner. Secure it using zip ties (Figure 1B).
- The scanner will be controlled using scanning software and an automatic scripting software.
- In the scanning software, select Home Mode (Figure 2A). Capture images in color by selecting Color under Image Type. To set the image quality, select Other under Destination and adjust the Resolution to 300 dpi. Keep the standard size for the images by selecting Original for Target Size. Leave all options under Image Adjustments unchecked for standard image quality.NOTE: Target Size is set to Original by default. To select other options for Target Size, click on Preview first.
- Set the saving path of images by clicking on the folder icon to the right of Scan to open File Save Settings (Figure 2A).
- Select the folder destination for saving images by selecting Other under Location and click on Browse. Choose a folder to save the images.
- Name the images in the Prefix text box. Set Start Number 001 to begin naming sequence for the images. Set the file format to JPEG by choosing JPEG (*.jpg) for Type under Image Format and click on Options to adjust for Details. Set the image format quality by adjusting Compression Level to 16, Encoding to Standard, and check Embed ICC Profile. Click OK to close the window (Figure 2B).
- Leave the first option unchecked ("Overwrite any files with the same name") and check the 3 next options ("Show this dialog box before next scan", "Open image folder after scanning", and "Show Add Page dialog after scanning"). Click OK to close the window
- Check the image quality by clicking on Preview. The preview window appears, and the Scan icon becomes functional (Figure 2C).
- Use the scripting software to automate the image acquisition. The provided script clicks on Scan in the Scan window and OK in the File Save Settings window at 30 min intervals.
- Import the script by clicking on Task | Import and select both Single_scan.tsk and Idle_scanning.tsk. See Figure 2D.NOTE: Single_scan.tsk clicks on the Scan button in the Scan window and OK in the File Save Settings window. Idle_scanning.tsk activates Single_scan.tsk every 30 min. One may change the scan frequency by changing the activation of Idle_scanning.tsk.
- Enable automatic scanning at 30 min intervals by selecting both Idle scanning (imported) and Single scan (imported), right clicking on Idle scanning (imported), and left clicking on Enabled (Figure 2D).
NOTE: Automatic scanning runs until the user manually stops the script. To stop the script, select Idle scanning (imported), right click Idle scanning (imported), and left click on Enabled. The check mark will be removed.
2. Compiling Time-lapse Images and Measuring Swarm Repulsion
- Perform movie editing and image analysis using ImageJ.
- Import all the scanned images to ImageJ by clicking on File | Import | Image Sequence and select the images. In the Sequence Options window, check Convert to RGB to keep images in color. Number of images indicates the number of images selected.
- Keep Starting image at 1 to start from the first picture in the folder and Scale images at 100% to conserve original size of the images. Leave Use virtual stack unchecked. Click OK and wait for images to load (Figure 3A).
- Set the video compression level to 100 by clicking on Edit | Options | Input/Output… and adjust JPEG quality to 100.
- Save the file as an .avi by clicking on File | Save As | AVI. Adjust Compression to JPEG and Frame Rate to 5 fps (Figure 3B). Save the .avi time-lapse in the desired folder.
- To quantify swarm repulsion distances, open an image near the end of the swarming period in ImageJ. Click on File | Open and select the image. Adjust the scale by clicking on Analyze | Set Scale and setting Distance in pixels to 118, Known distance to 1, Pixel aspect ratio to 1.0, and Unit of length to cm (Figure 3C). Leave Global unchecked. Click OK to close the window.
- Click on the Straight icon and measure from the center of the colony at the satellite position to the edge of the swarming population. Select Analyze | Measure to make a new window appear with the measurements (Length) (Figure 3D).NOTE: Use "+" to zoom in closer and "-" to zoom out.
Access restricted. Please log in or start a trial to view this content.
Results
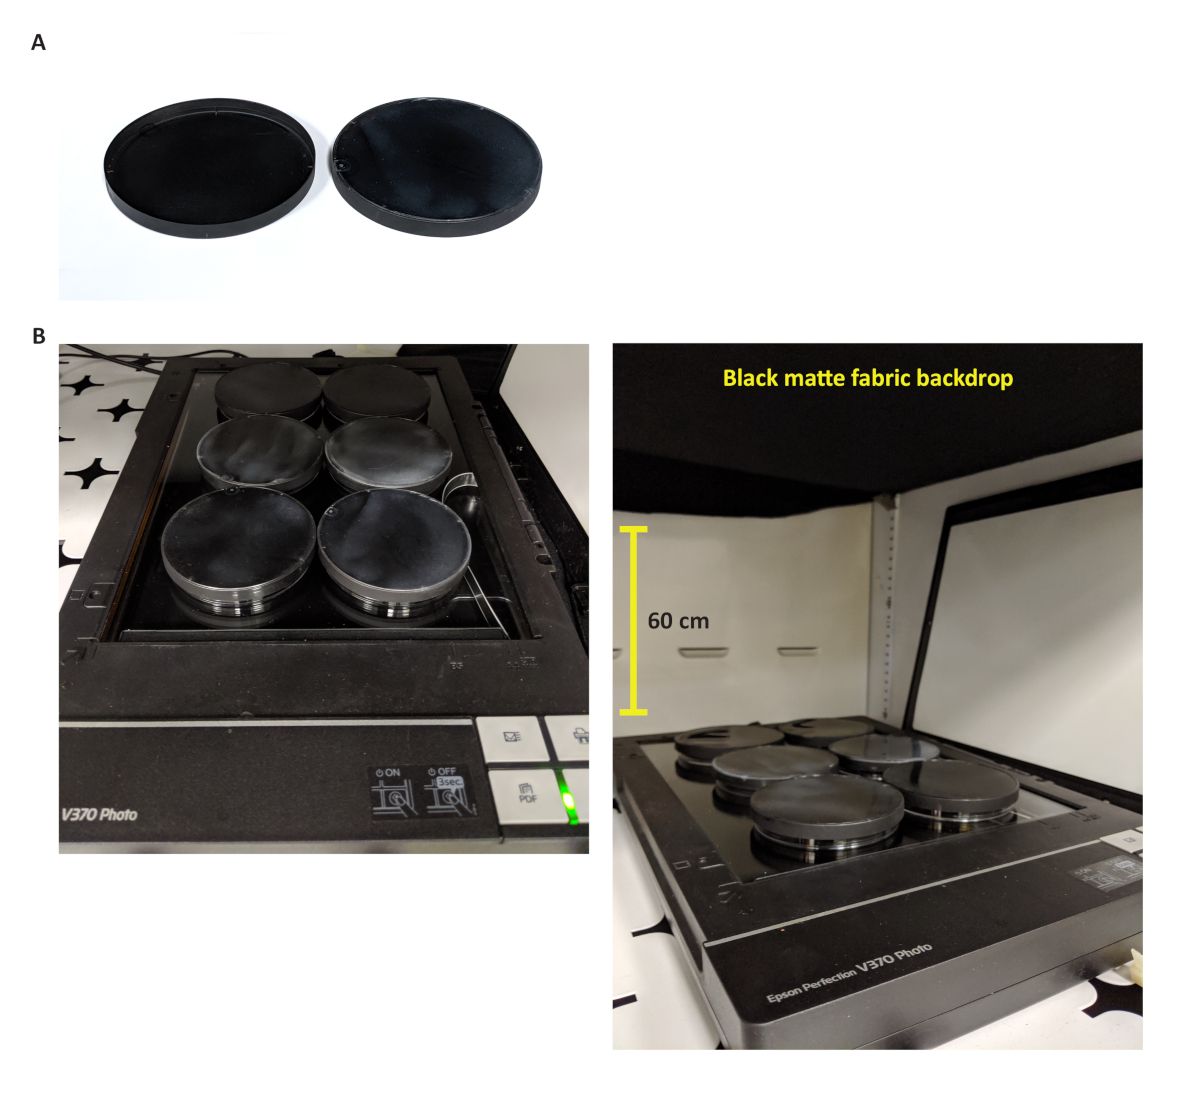
Figure 1: Scanner setup inside the incubator. (A) Black Petri dish lids. These lids a...
Access restricted. Please log in or start a trial to view this content.
Materials
| Name | Company | Catalog Number | Comments |
|---|---|---|---|
| Reagents | |||
| Bacto agar, dehydrated | BD Difco | 214010 | For LB-agar plate and swarming agar plate |
| Casamino acids | BD Difco | 223050 | For swarming media |
| D-Glucose | Fisher Chemical | D16500 | Dextrose. For swarming media |
| Magnesium sulfate heptahydrate | Sigma-Aldrich | 230391 | For swarming media |
| Potassium phosphate monobasic | Sigma-Aldrich | P0662 | For 5X M8 media |
| Sodium chloride | Sigma-Aldrich | S9888 | For 5X M8 media |
| Sodium phosphate dibasic heptahydrate | Fisher Chemical | S373 | For 5X M8 media |
| Strains | |||
| Pseudomonas aeruginosa | Siryaporn lab | AFS27E.118 | PA14 strain |
| Supplies | |||
| Black spray paint | Krylon | 5592 Matte Black | For black lids |
| 8 inches zip ties | Gardner Bender | E173770 | For attaching black matte fabric |
| Petri dishes (100 mm x 15 mm) | Fisher | FB0875712 | 100 x 15 mm polystyrene plates |
| Equipment | |||
| ImageJ | NIH | v1.52a | Software for image analysis |
| Incubator | VWR | 89032-092 | For growth of bacteria at 37 °C |
| Scanner | Epson | Epson Perfection V370 Photo | Scanner for imaging plates |
| Scanner automation software | RoboTask Lite | v7.0.1.932 | For 30-min internals imaging |
| Scanner image acquisition software | Epson | v9.9.2.5US | Software for imaging plates |
