A subscription to JoVE is required to view this content. Sign in or start your free trial.

Method Article

Two-Photon Microscopy of Astrocytes and Excitatory Neurons in a Cleared Mouse Hippocampal Tissue

667 views

May 29th, 2025

In This Article

Abstract

Source: Refaeli, R., et al., Investigation of Spatial Interaction Between Astrocytes and Neurons in Cleared Brains. J. Vis. Exp. (2022)

The video demonstrates the preparation of a chamber and the neuroimaging of cleared mouse hippocampal tissue using two-photon microscopy to visualize the spatial interactions between fluorescently labeled astrocytes and excitatory neurons.

Protocol

All procedures involving animal samples have been reviewed and approved by the appropriate animal ethical review committee.

1. Chamber preparation

NOTE: Each sample requires a slide with an imaging chamber in which the sample will be placed.

  1. Place the sample in the middle of the slide.
  2. Using a hot glue gun, create walls at the edges of the slide, almost as high as the tissue. Make sure to leave a small gap (approximately 5 mm) at one of the corners (Figure 1A, B).
  3. Apply 1-2 drops of the refractive index matching solution or RIMS on the sample to keep the upper surface moist and prevent bubbles from forming between the coverslip and the tissue.
  4. Immediately after applying the RIMS (Refractive index matching solution) drops, add the last layer of hot glue to the walls (so that they reach the height of the brain/slice) and progress immediately (while the hot glue is still liquid) to step 1.5.
  5. Seal the top with a coverslip, placing it as evenly as possible on the top of the still-warm hot glue layer (Figure 1C).
  6. Fill the chamber with the RIMS through the gap left in the hot glue walls (Figure 1D, E).
  7. Close the gap with hot glue. Leave no air inside (Figure 1F).
  8. If the hot glue walls extend beyond the slide's borders, cut the extending edges (Figure 1G).
  9. If the objective used for imaging is immersed, add another 2-3 mm of glue to the walls above the coverslip so that the immersion solution lasts longer (Figure 1H).

Access restricted. Please log in or start a trial to view this content.

Results
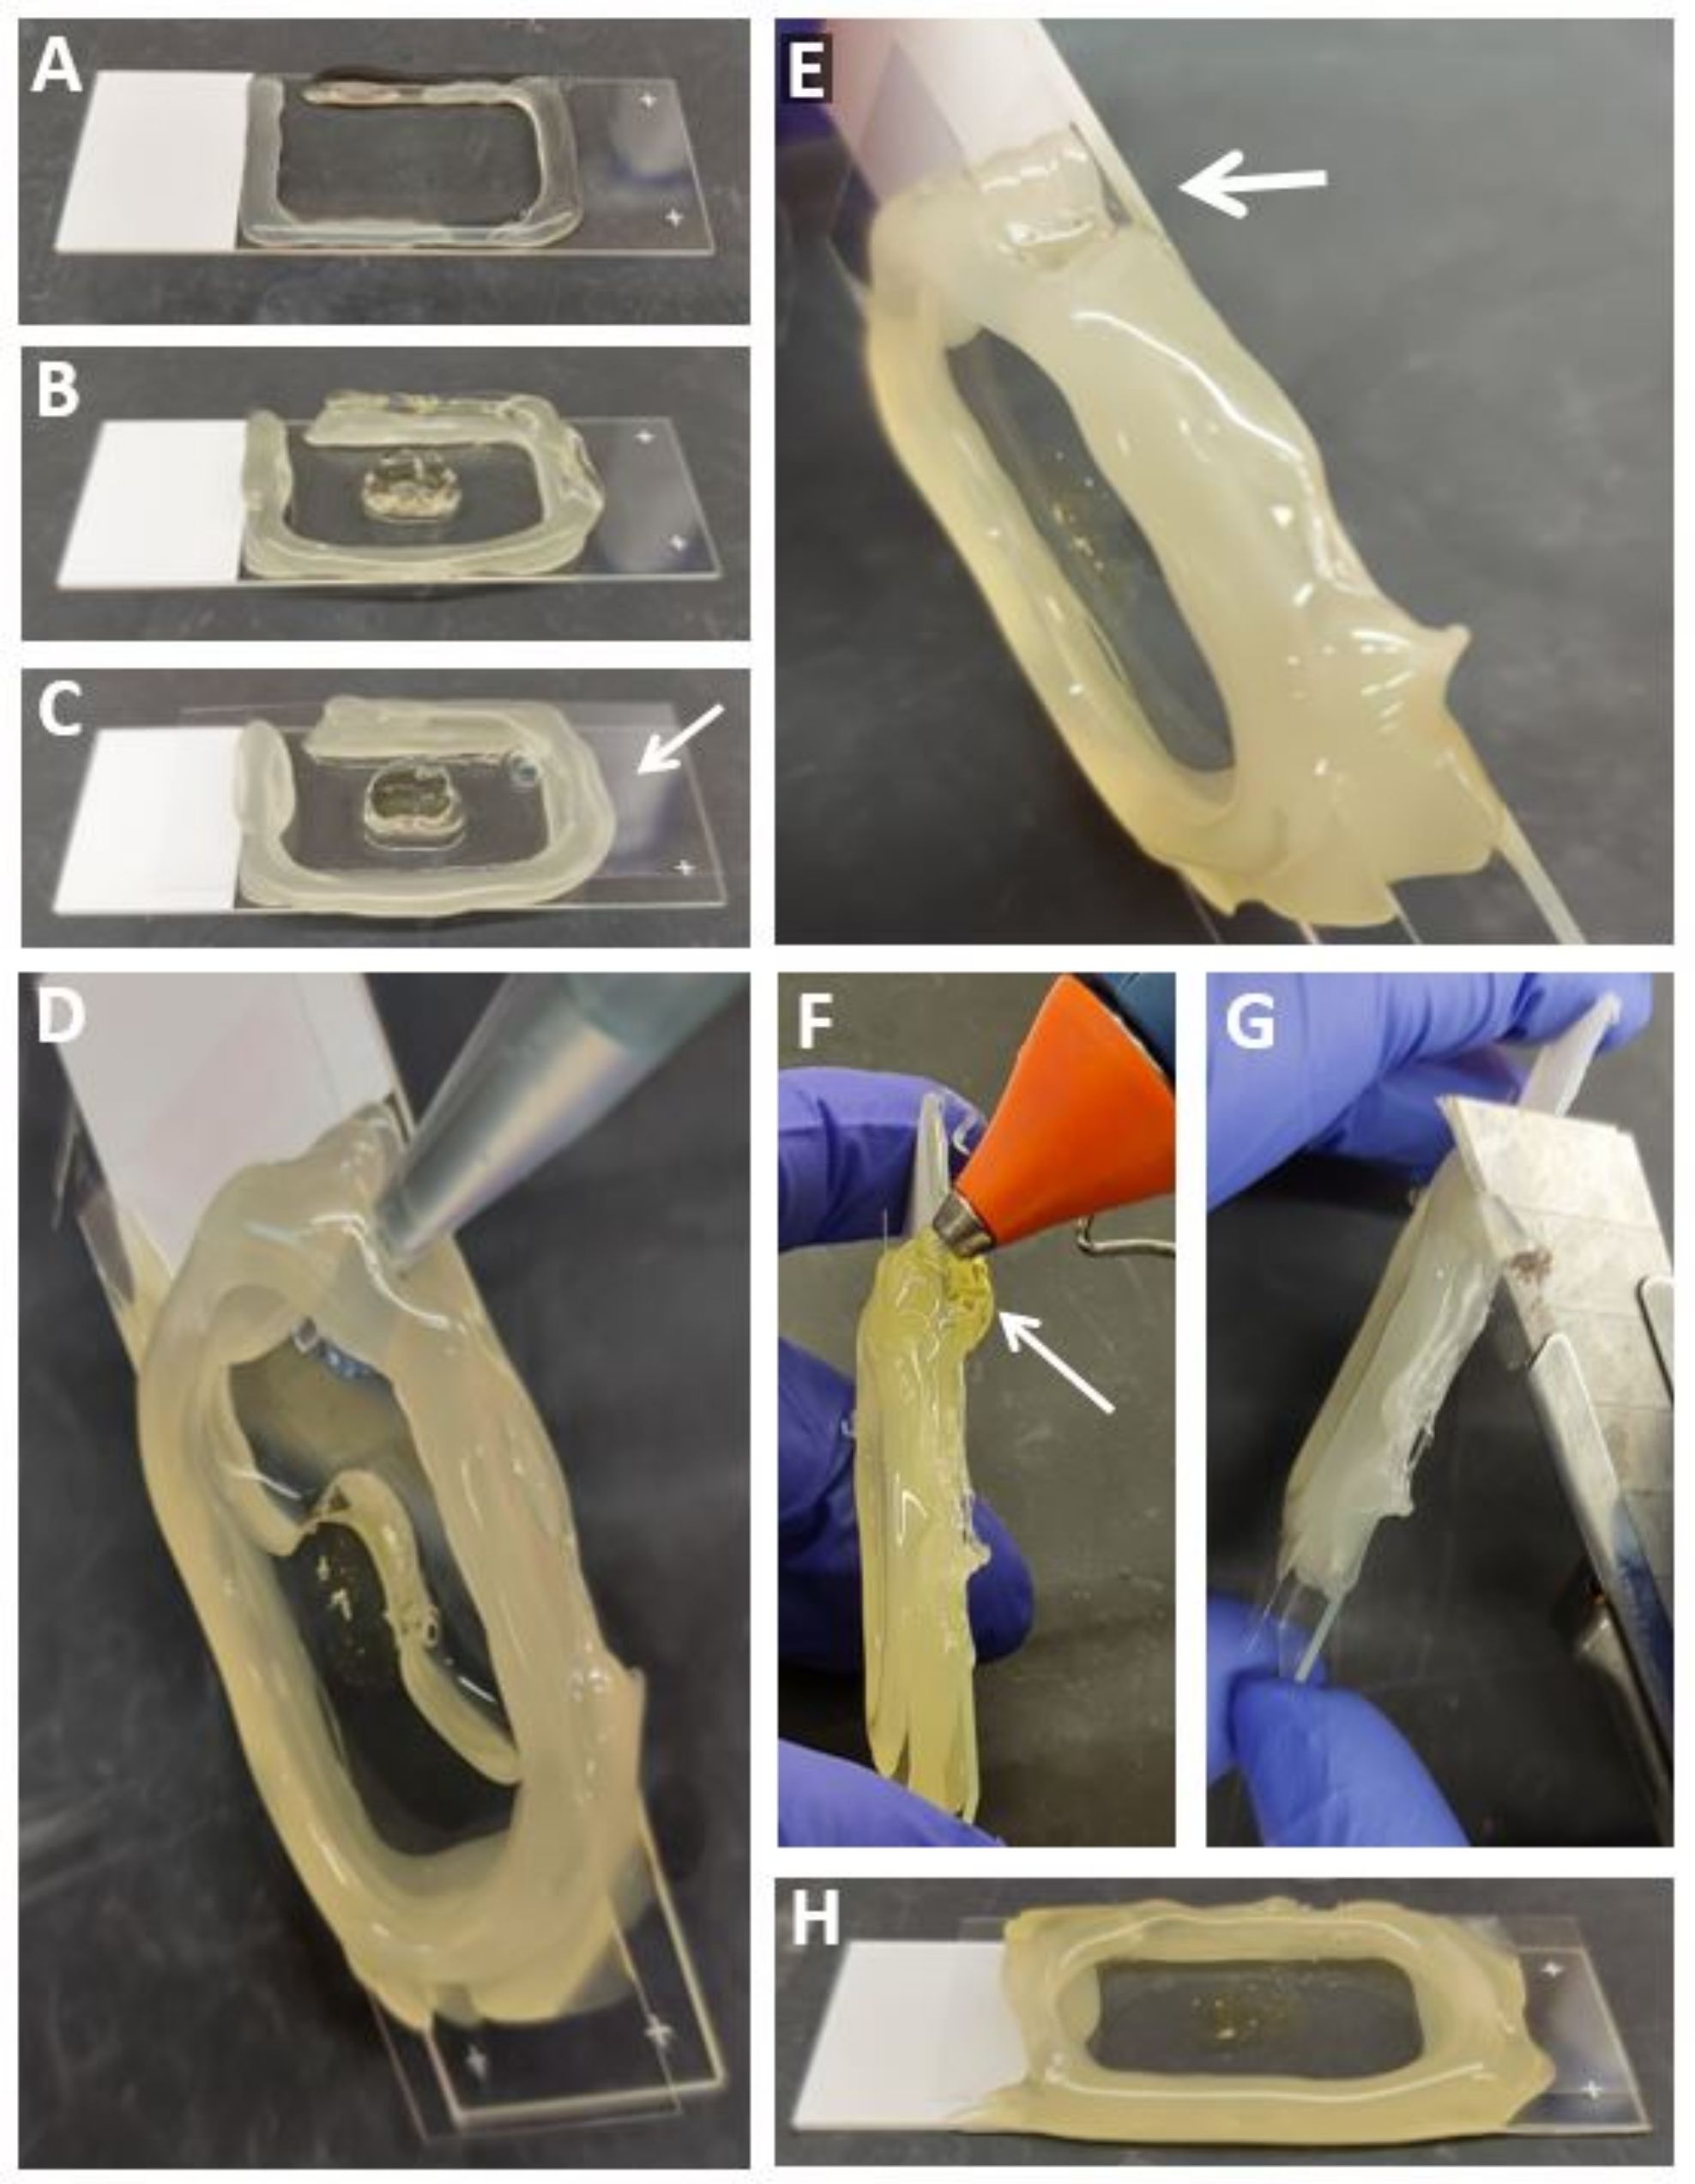
Hydrogel sealing process; sequence of steps in lab setup for cell culture experiment.

Access restricted. Please log in or start a trial to view this content.

Materials

List of materials used in this article
NameCompanyCatalog NumberComments
AAV1-GFAP::TdTomatoELSC Vector Core Facility (EVCF) Viral vector used to detect astrocytes
AAV5-CaMKII::eGFPELSC Vector Core Facility (EVCF) Viral vector used to detect neurons
AAV5-CaMKII::H2B-eGFPELSC Vector Core Facility (EVCF) Viral vector used to detect neuronal nuclei
AAV5-CaMKII::TdTomatoELSC Vector Core Facility (EVCF) Viral vector used to detect neurons
Imaris softwareBitplane, UK A software that allows 3D analysis of images
RapiClearSunJin lab#RC147002
RapiClear CSSunJin lab#RCCS002
SyGlass software A software that allows 3D analysis of images using virtual reality
Two photon microscopeNeurolabware Ti:sapphire laser (Chameleon Discovery TPC, Coherent), GaAsP photo-multiplier tubes (Hamamatsu, H10770-40) , bandpass filter (Semrock), water immersion 16x objective (Nikon, 0.8 NA)
VA-044 InitiatorWako#011-19365

Tags

Astrocyte Neuron InteractionRefractive Index MatchingFluorescent Protein LabelingHydrogel EmbeddingHot Glue ChamberNear-Infrared ExcitationSpatial Proximity ImagingCleared Brain Tissue