The video demonstrates real-time calcium imaging using a miniscope in a transduced mouse, correlating neuronal activity with behavior.
A subscription to JoVE is required to view this content. Sign in or start your free trial.
Method Article
Real-Time Calcium Imaging of a Mouse Medial Prefrontal Cortex Using a Miniscope
1.2K views
⸱
June 17th, 2025
In This Article
Abstract
Protocol
Miniscope mounting and in vivo Ca2+ imaging (Figure 1)
- Mount the miniscope to its base
- Anesthetize the mouse briefly in the induction chamber (5% isoflurane and 1 L/min oxygen flow rate). Place the mouse on a clean bench surface.
- Loosen the locking screw with a small screwdriver, remove the protective cap, and clean the surface of the GRIN (Gradient-index lens) lens with an acetone-soaked cotton swab.
- Wrap a PTFE tape (Polytetrafluoroethylene tape) tightly around the miniscope thread and fasten the miniscope to its base on the mouse head.
- Connect the miniscope to the cable (Figure 2K), and turn on the NeuView Software.
- In NeuView, click Hardware, check LED1, and click the Stream button to view the live images (Figure 3A).
- Identify the best focal plane by adjusting the position of the miniscope relative to the base, either slightly tightening or loosening with the help of blunt forceps.
NOTE: The best focal plane is determined by comparing several possible locations and selecting the one with a clear visualization of most cell bodies. - Tighten the locking screw and place the mouse back in its home cage.
- In NeuView, adjust the LED light power to the optimal level. Click on Capture and then Trigger buttons to start recording and hit Stop after 150 frames.
NOTE: The lowest possible power determines the optimal level of the LED power for achieving a bright enough image. The purpose of recording a short video is to facilitate identifying the same focal plane in the future for repetitive imaging. - Disconnect the cable from the miniscope. Let the mouse recover for at least 30 min before starting the experiment.
NOTE: To protect the miniscope, typically, the water bottle and the wire food feeder are removed during this short period of time. If the mouse needs to stay in its home cage for longer, it is recommended to supply commercially available diet gel (see Table of Materials) in the home cage.
- Data acquisition for in vivo calcium imaging
NOTE: In vivo, calcium Imaging can be simultaneously conducted along with any behavior tests that the researcher desires. For demonstration purposes, the example here is in vivo Ca2+ imaging during an open field test. To accomplish this goal, two computers are required. One computer is equipped with commercial software (see Table of Materials) to control a camera to record mouse behavior automatically. The other computer is equipped with NeuView to control the miniscope and to record the Ca2+ images.- Turn on the behavior camera software (see Table of Materials) to view the mouse behavior arena through a Livestream function. Manually adjust the focus of the top camera (Figure 2L).
- Select Trigger/Strobe and check "Enable/disable trigger" (Figure 3B). Click the Record button, use Browse to select the location where behavior recordings will be saved, and select the desired image format.
NOTE: The "Trigger Control" function is enabled to allow the behavior recording to be triggered by the NeuView software so that the behavior frames and the corresponding calcium imaging frames are temporally coupled together. The behavior recording can be saved in any desired format. Behavior recording is generally saved in JPEG format in the designated folder. - Bring the mouse close to the arena and connect the miniscope to the cable linked to the Data Acquisition System (Figure 2L) (see Table of Materials). The mouse is then placed in the center of the arena.
- With the Livestream function of the NeuView software, adjust the LED power to optimize the brightness of the calcium image.
NOTE: For calcium imaging, the recording frame rate is 10 frames/s by default. - In NeuView, uncheck LED1, click on Capture, and then Trigger buttons to start recording, and hit Stop after 100 frames.
NOTE: This is to record background images for about 100 frames with LED lights off. - In the behavior camera software, click Start Recording (Figure 3C). In NeuView, check LED1, click on Capture, and then the Trigger buttons to start recording. Hit Stop after 3000 frames.
NOTE: This is to record calcium imaging and behavior simultaneously. The open-field test is 15 min long, typically broken down into three recording sessions each of 5 min. This is to prevent the miniscope from overheating due to continuous use. - Save both the calcium imaging and behavior recordings in the designated folders. Repeat the recording for two more sessions while recording the background before each session, and save all the recordings in the designated folder.
Access restricted. Please log in or start a trial to view this content.
Results
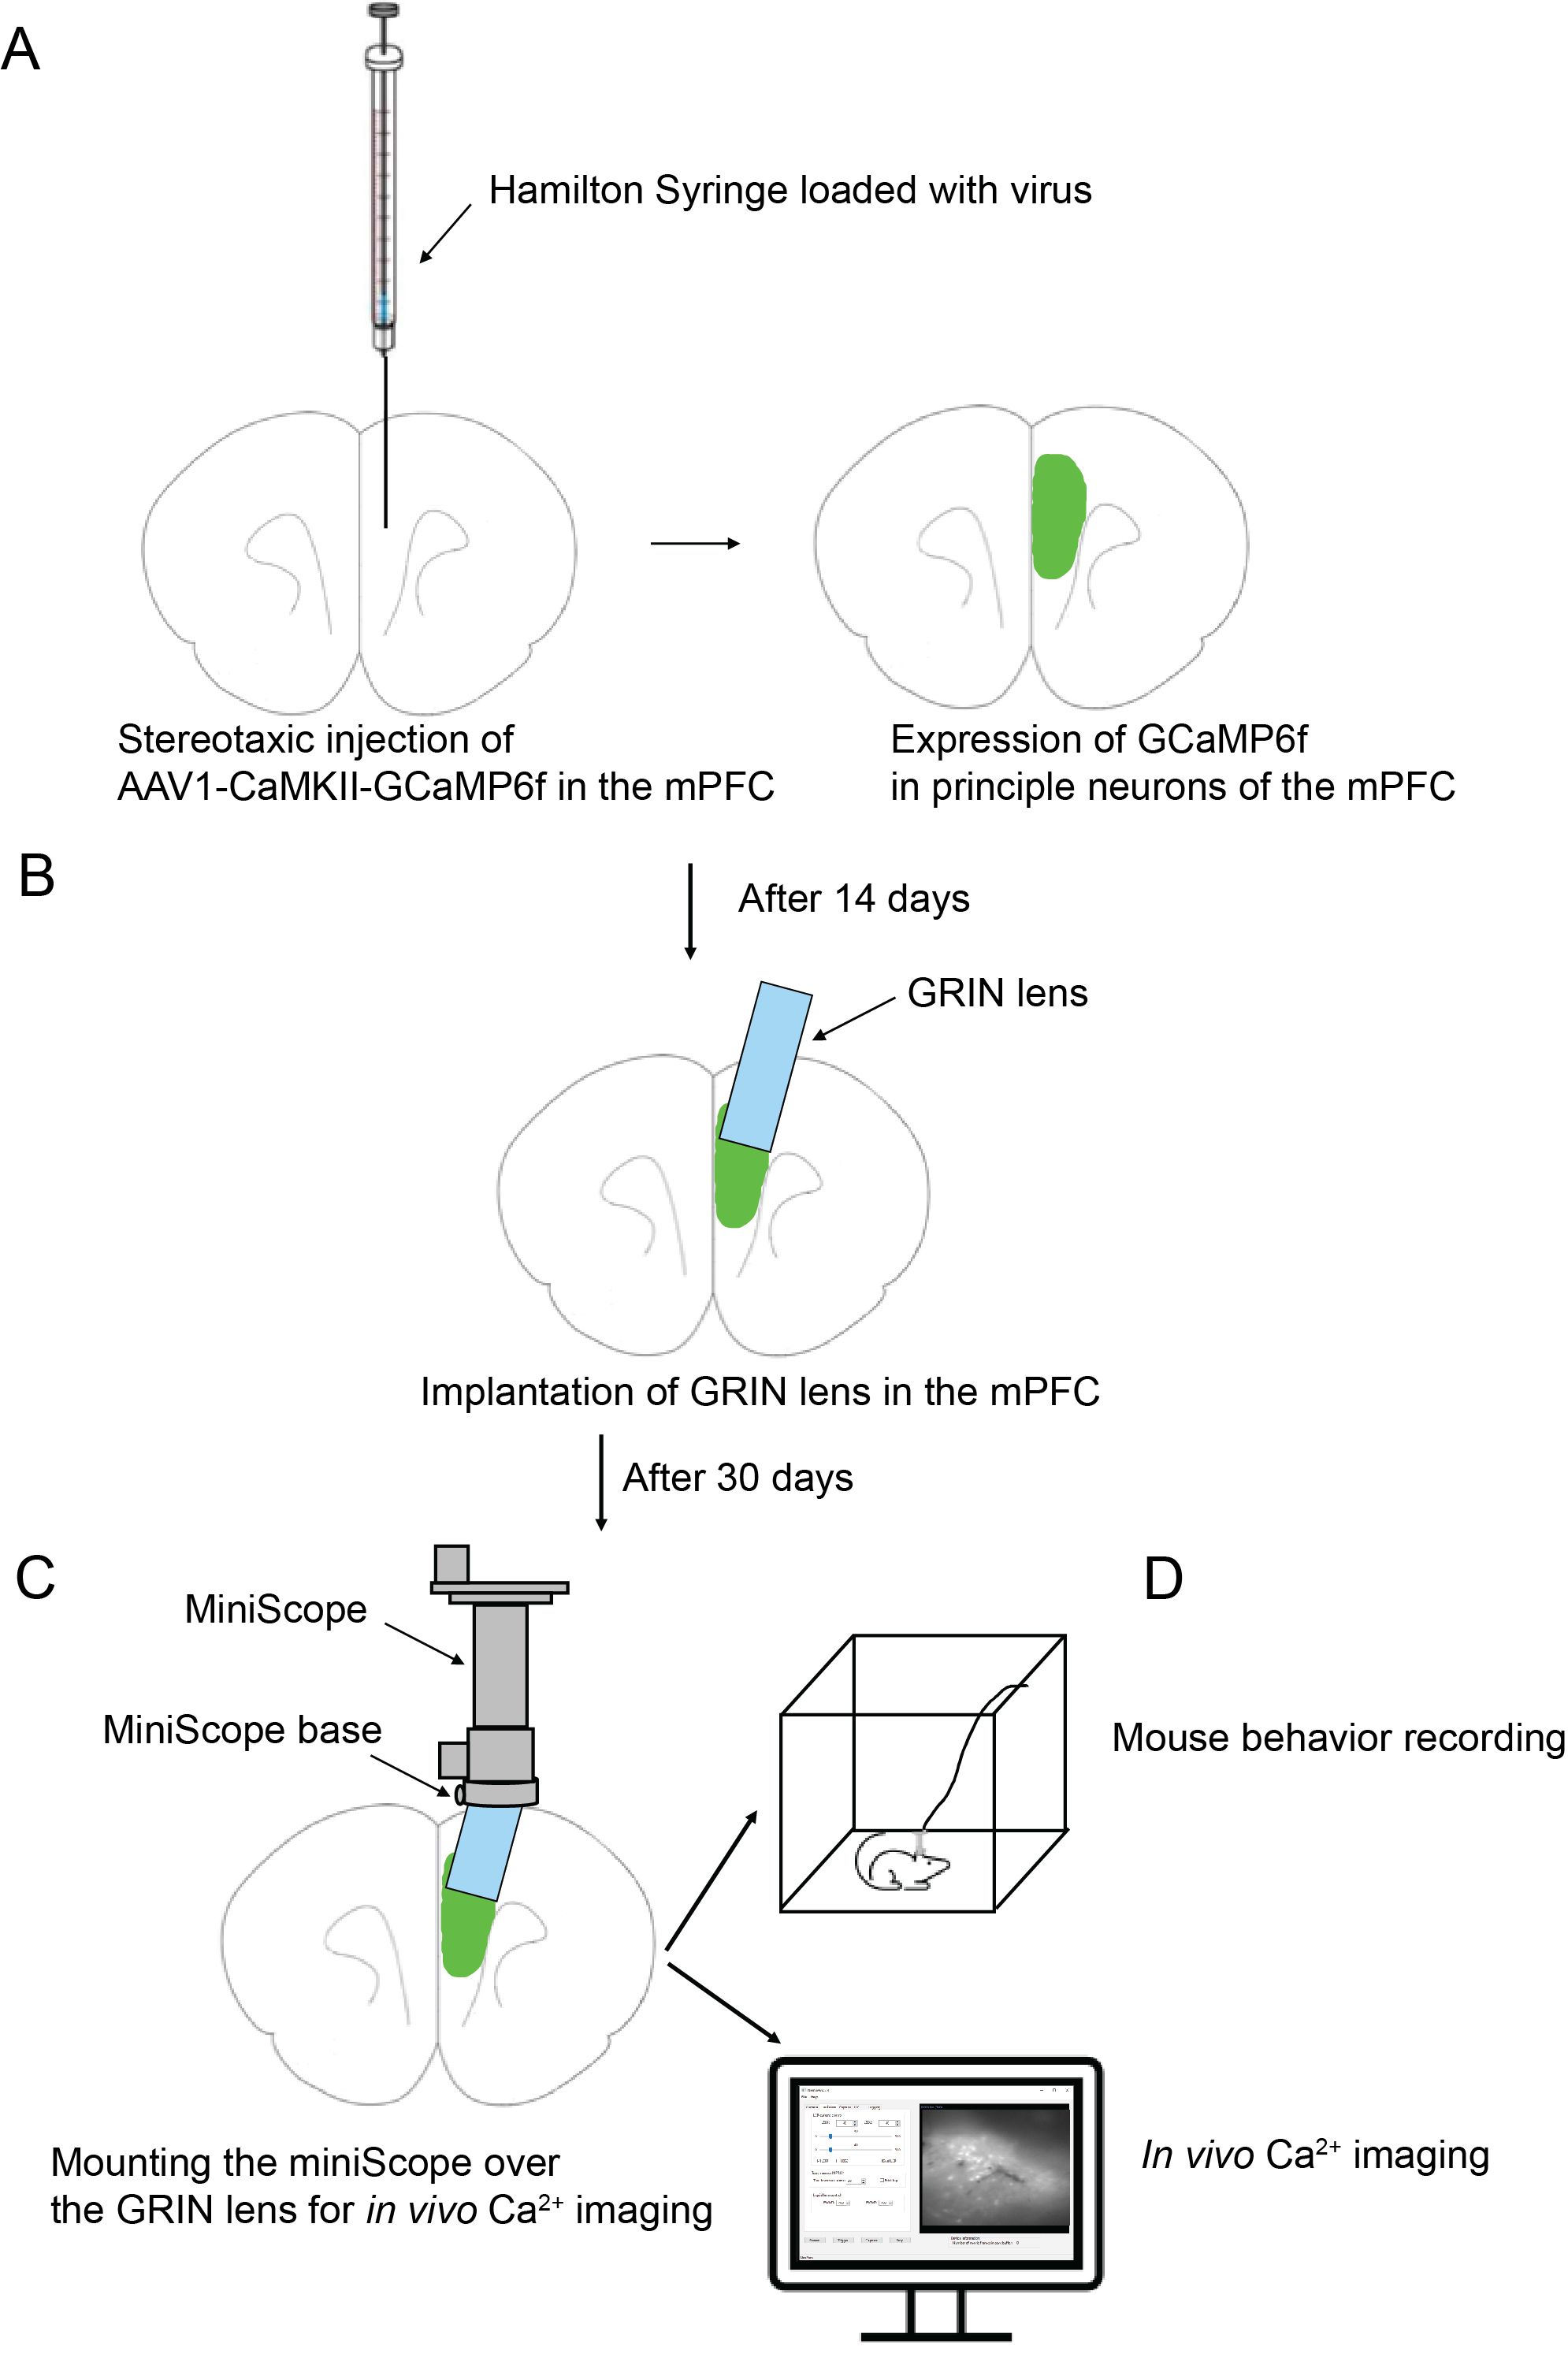
Figure 1: Schematic overview of the experimental procedure. (A...
Access restricted. Please log in or start a trial to view this content.
Materials
| Name | Company | Catalog Number | Comments |
|---|---|---|---|
| Acetone | Sigma-Aldrich | 179124-1L | GRIN lens cleaner |
| Behavior Recoding Software (Point Grey FlyCap2) | Point Grey | Point Grey Research Blackfly BFLY-PGE-12A2C | For recording behavior |
| Data acquisition controller | NIDA/IRP | Custom-designed | Component of image acquisition system |
| Data transmission cable | NIDA/IRP | Custom-designed | Component of image acquisition system |
| GRIN lens | GRINTECH | NEM-100-25-10-860-S | For GRIN lens implantation |
| Miniscope base | Protolabs | Custom-designed | For mounting the base |
| Miniscope holding arm | NIDA/IRP | Custom-designed | For mounting the base |
| Miniscope protection cap | Protolabs | Custom-designed | For protecting the miniscope |
| Motorized controller | Thorlabs | KMTS50E | For mounting the base |
| NeuView | NIDA/IRP | https://github.com/giovannibarbera/miniscope_v1.0 | For in vivo imaging |
| Ophthalmic ointment | Puralube Vet Ointment | NDC 17033-211-38 | Ophthalmic |
| Polytetrafluoroethylene (PTFE) tape | TegaSeal PTFE Tape | A-A-58092 | For fastening miniScope to the base |
| Sterile cotton swab | Puritan | REF 806-WC | For both surgeries |
