This video demonstrates the implantation of a flexible, biocompatible probe in a glioblastoma mouse model to deliver targeted pulsed electric field therapy for neurotherapeutic applications.
A subscription to JoVE is required to view this content. Sign in or start your free trial.
Method Article
Implantation of a Flexible Biocompatible Probe in a Glioblastoma Mouse Model
688 views
⸱
August 29th, 2025
In This Article
Abstract
Protocol
All procedures involving animal models have been reviewed by the local institutional animal care committee and the JoVE veterinary review board.
- The in vivo model
NOTE: Adult multicolor fluorescent AMU-Neuroinflam mice (B6.Cg-Tg(Thy1-CFP)23Jrs(Ly6a-EGFP)G5Dzk(Itgax-EYFP)1Mnz/FD) were used; these mice present labeling of a subpopulation of Thy1+ neurons by transgenic expression of ECFP, labeling of peripheral LyzM+ inflammatory cells by transgenic expression of EGFP and labeling of a subtype of microglia expressing EYFP under the control of Cd11c+. In brief, the animals are lightly sedated with 1.5% isoflurane for 2 mins before any treatment or injection. Before the surgery, the animals are anesthetized with Ketamine (120 mg/kg; IP) and Xylazine (12 mg/kg; IP). Then, 3% Lidocaine gel is applied locally to alleviate any pain in the ears associated with the fixation of stereotactic support. Then, 0.25% Bupivacaine solution is administered to the surgical site to alleviate any pain due to the craniotomy. Once the mouse was prepared for surgery, a craniotomy of 4 mm diameter was performed. With a 26 G needle, a hole was made in the dura-mater in the middle of the craniotomy, and the tumor spheroid was injected with the injection system. Additionally, as described here, a flexible electrode was placed on the GCamp6 or DsRed expressing tumor spheroid before sealing the craniotomy with a glass window.- Place a drop of Dulbecco's phosphate-buffered saline (DPBS) so that it covers the craniotomy. Place the flexible electrode onto the drop of DPBS, and gently place the back of the probe with contact pads onto the mouse's back (Figure 1B).
NOTE: Use sterile gloves and a “tip only” technique. Change the gloves if a non-sterile surface is contacted. Provide thermal support during this procedure. - Touch the DPBS drop with a small piece of paper to absorb DPBS until the probe can lay flat on the dura and follow the curvature of the brain. Ensure that a small layer of DPBS remains below the electrodes without escaping from the side of the electrode. This ensures a barrier against glue spillover during the next steps.
NOTE: Sterilize all equipment before use. - Place a small drop of silicone adhesive onto the probe and cover it with a 5 mm round cover glass. Push the cover glass down until the silicone is evenly distributed and the distance between the cover glass and the probe is minimal. Push the cover glass down for another 30 seconds so that the silicone can solidify.
- To secure the cover glass, quickly apply superglue on its sides and push it down until the glue cures to solid.
- Using a toothpick, apply superglue to the probe's neck, taking care that the superglue is drawn under the neck to provide stable support for it.
- Cover the skull with dental cement to build a chronic cap. Take special care to cover the edges of the cover glass only.
- Lift the back of the probe and apply cement underneath its neck. Rest the probe on the cement before it cures. Gently push down the neck of the probe with blunt forceps so that its surface is at the same level as that of the cover glass and not in the way of the microscope objective during the experiment.
- Cover the top of the probe neck with not more than 1.5 mm of dental cement layer to achieve a firm hold on the probe. Build a cement well presenting a 1.5 mm ridge at a distance of 1-2 mm around the cover glass to create a basin for the immersion fluid for the two-photon imaging (Figure 1C).
- After the cement has cured, apply buprenorphine post-surgical analgesics (0.05 mg/kg, 0.1 mL per 10 g of body weight subcutaneously) and maintain the animal in a warm atmosphere until it wakes up. This includes proximity to an infrared light bulb as well as wrapping the animal in a paper towel.
NOTE: Place a thermometer at the level of the mouse to monitor the temperature. - Characterize impedance in the 1-10 kHz range using a potentiostat.
- Let the animal recover from the surgery for at least 10 days. Administer anti-inflammatory drugs immediately after surgery and continue monitoring the animal's state to provide appropriate post-operative analgesia.
- Place a drop of Dulbecco's phosphate-buffered saline (DPBS) so that it covers the craniotomy. Place the flexible electrode onto the drop of DPBS, and gently place the back of the probe with contact pads onto the mouse's back (Figure 1B).
Access restricted. Please log in or start a trial to view this content.
Results
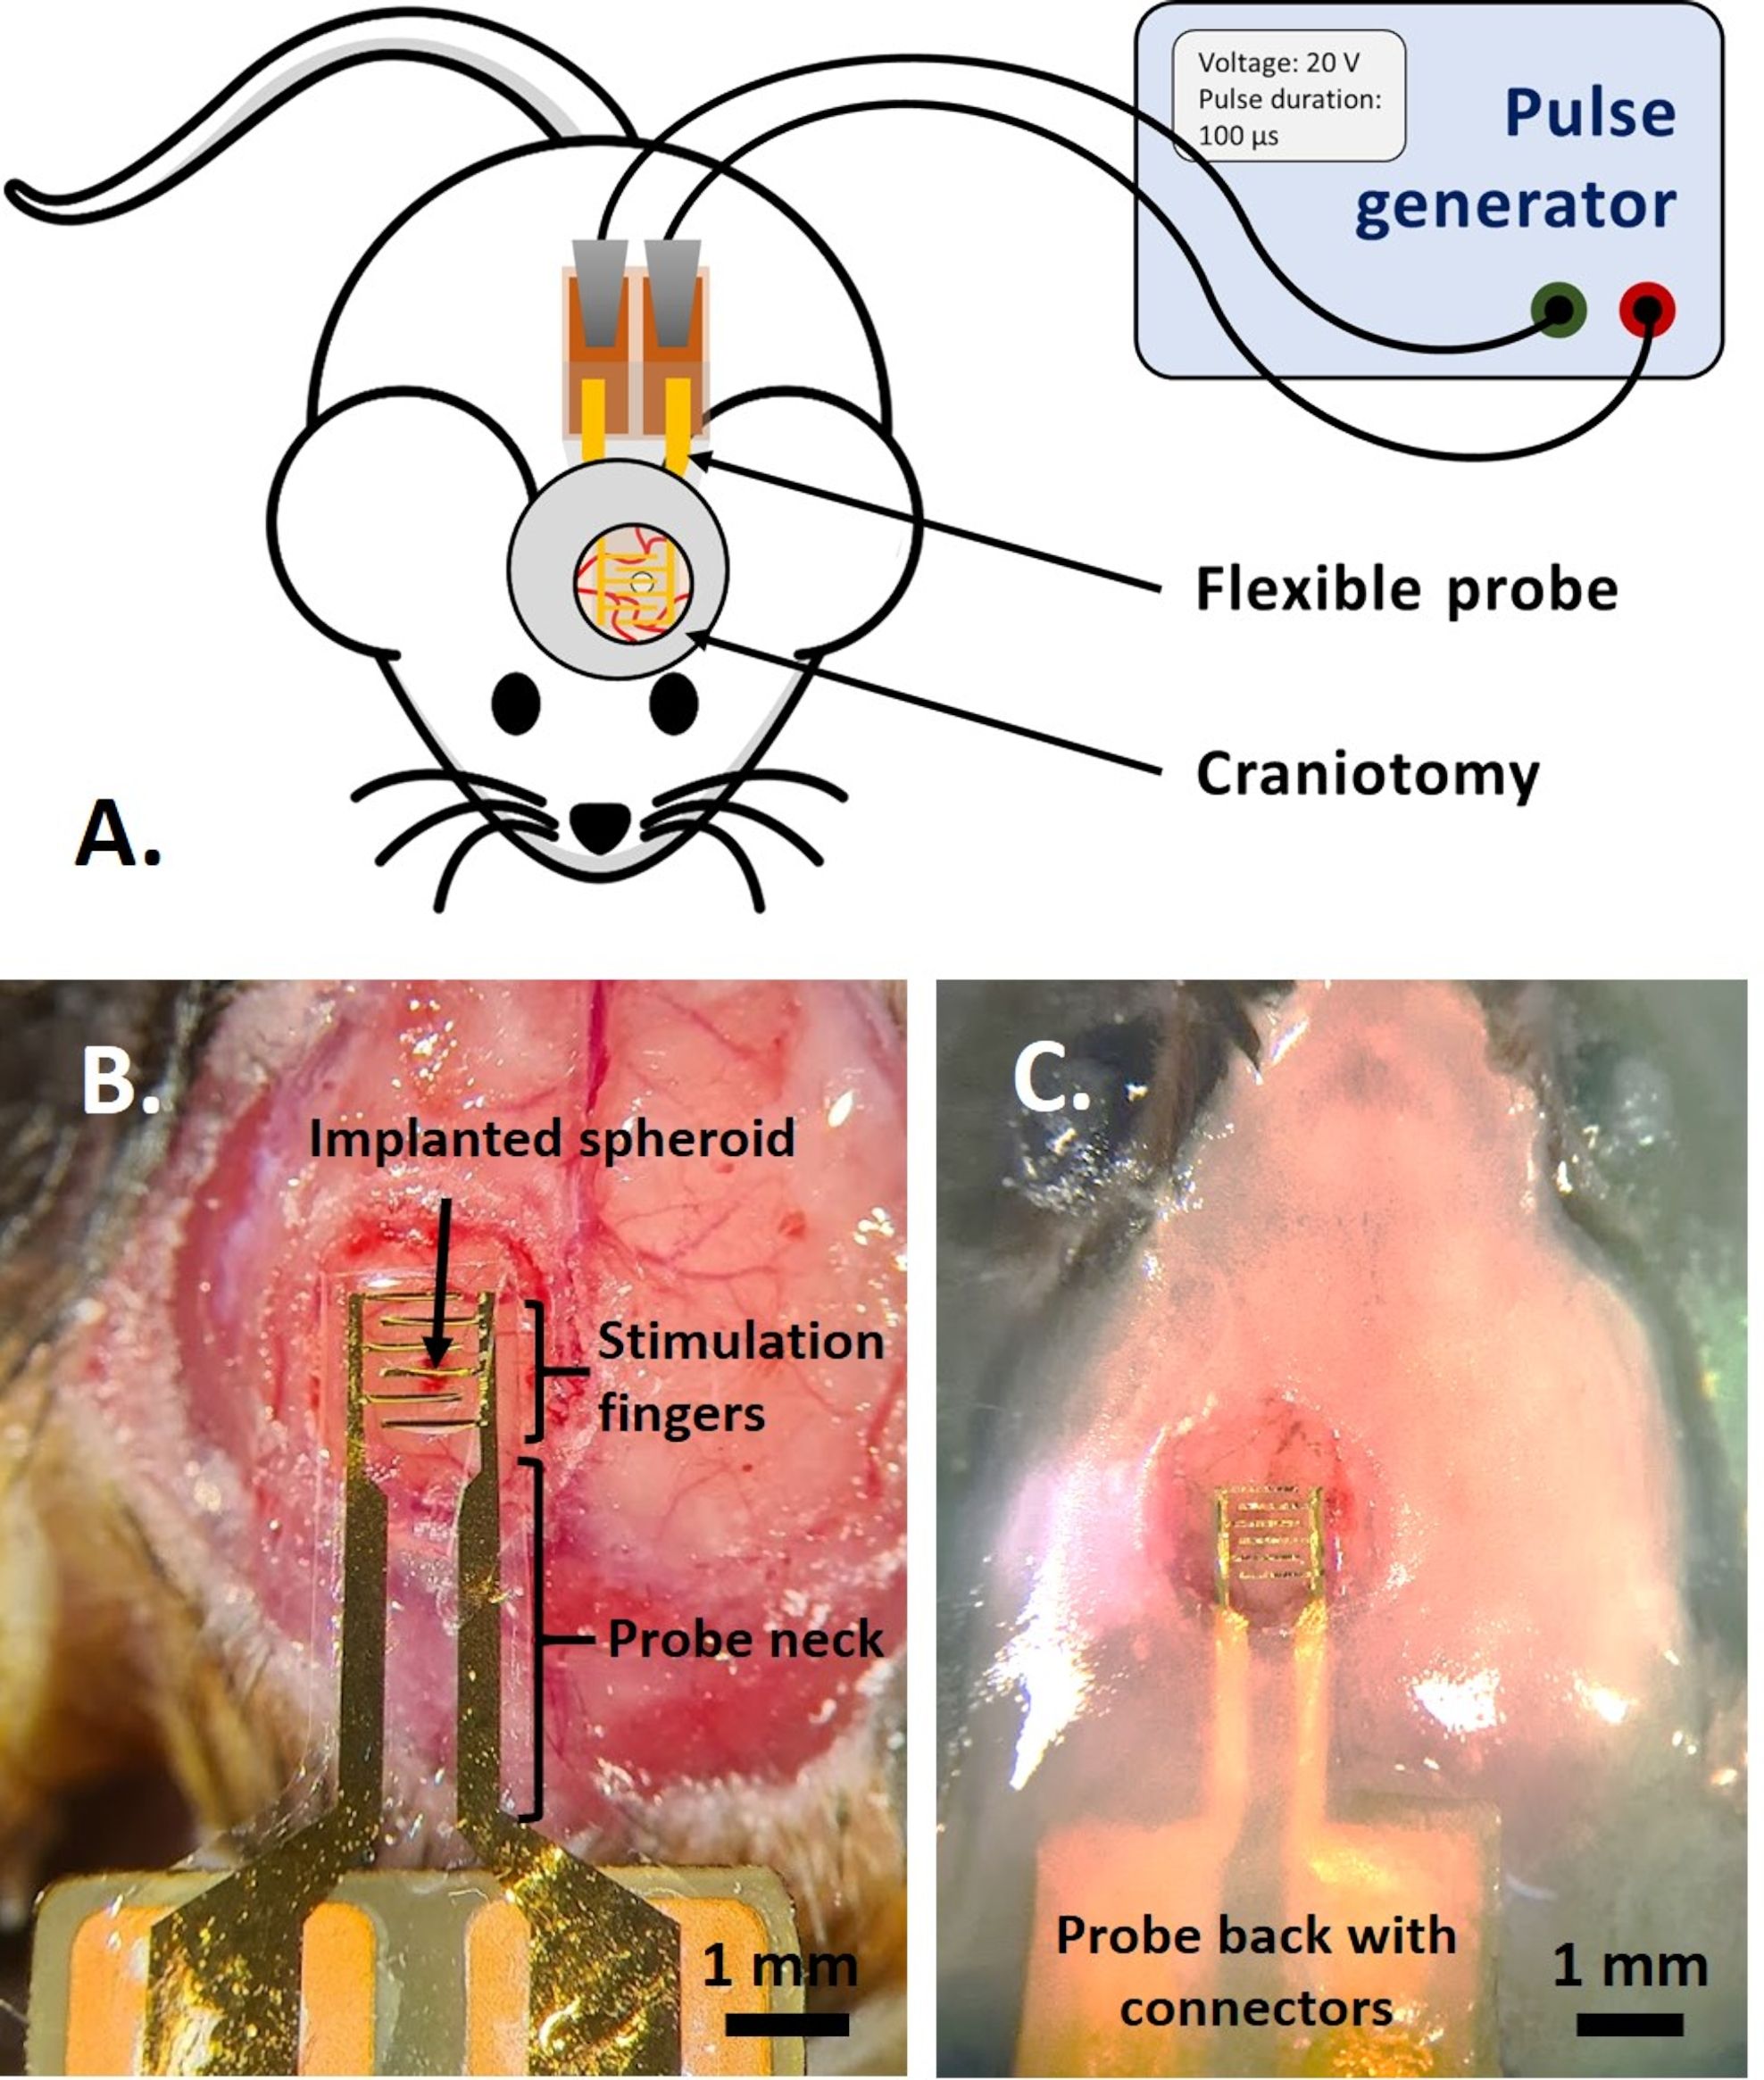
Figure 1: The in vivo application. (A) Scheme for in...
Access restricted. Please log in or start a trial to view this content.
Materials
| Name | Company | Catalog Number | Comments |
|---|---|---|---|
| Acrylic resin | Fischer scientific | NC1455685 | |
| Buprenorphine | Axience | ||
| Lab made pulse generator | |||
| Penicillin / Streptomycin | Gibco | 15140-122 | |
| Phosphate Buffer Saline solution | Thermofisher | D8537 | |
| Protolaser S | LPKF | ||
| Round cover glass 5 mm diameter | Fischer scientific | 50-949-439 | |
| Silicone adhesive Kwik-Sil | World Precision Instruments | ||
| Super glue | Office depot | ||
| U87-MG | ATCC | HTB-14 | Human glioblastoma cells |
