This video demonstrates the stereotaxic injection of human-derived interneuron precursor cells into the hippocampus of a genetically modified mouse pup with reduced inhibitory interneurons, aiming to restore excitatory-inhibitory balance.
A subscription to JoVE is required to view this content. Sign in or start your free trial.
Method Article
Transplantation of Human-Derived Interneuron Precursor Cells into the Mouse Pup Hippocampus
651 views
⸱
August 7th, 2025
In This Article
Abstract
Protocol
All procedures involving animal models have been reviewed by the local institutional animal care committee and the JoVE veterinary review board.
1. Intrahippocampal cell transplantation
NOTE: All the steps in this section are performed outside the cell culture hood in the animal facility. Early postnatal transplantation of cells into the brain was performed on P2, considering P0 on the day of birth.
- Prepare for the transplantation experiment by following the steps below.
- Autoclave all the surgical material or, if not possible, sterilize with another approved method.
- Mount the injecting syringe in the holder without any glass capillary. Rinse the needle with water.
NOTE: The needle must be 33 G. - Curve 90° the tip of a 30 G insulin needle.
- Create a homemade Play-Doh-like stage for positioning the pup with the head flat (Figure 1A).
- Fetch the mouse cage with the mother and pups before preparing anything for the surgery to allow them to acclimatize to the new environment.
- Prepare a tray with wet ice and an empty cage with some paper for the isoflurane.
- Anesthetize the mouse pup.
- Soak a piece of paper with isoflurane (see Table of Materials) and place it inside the empty cage. Carefully take one pup and place it into the cage with the paper soaked in isoflurane.
NOTE: Never leave fewer than three pups with the mum. Do not exceed 20-30 s of isoflurane anesthesia, or the pup may die. - Verify the effect of the anesthesia by movement cessation.
- Immediately after anesthesia, place the pup onto a wet tissue on the surface of wet ice. Keep the animal on ice for 3 min until the upper limbs become whiteish (Figure 1B, blue arrow). This usually takes 2-3 min.
- Use this time to load the syringe with the cell suspension. Resuspend the cells carefully with a pipette before.
- Place the pup on the stereotaxic frame. Use the ear bars in the opposite direction (Figure 1A, magenta arrows).
NOTE: The back side of the ear bars is less pointy, and as P2 pups do not have ears, use the flatter side to avoid hurting the animal. - From the side, check if the head is straight. The head must be flat; use the Play-Doh-like stage to adjust for that.
NOTE: Pups at this age have not yet opened their eyes, so no additional steps need to be taken in this regard. Pups do not have fur at this age, so no shaving of the area is required. No specific pain treatment is given as it is not an open incision to the skin, and no suturing is involved. - Keep the pup covered on ice (on top of tissue paper) for the entire duration of the surgery.
NOTE: Do not place the ice in direct contact with the pup's skin.
- Soak a piece of paper with isoflurane (see Table of Materials) and place it inside the empty cage. Carefully take one pup and place it into the cage with the paper soaked in isoflurane.
- Perform the injection.
- Clean the surface of the skin using a soft tissue soaked in ethanol.
- Identify lambda and set the coordinates to zero on the digital display console of the stereotaxic instrument (Figure 1C, yellow dashed line). Sagittal and lambdoid sutures are easily visible to the eye since they are vascularized as red lines.
NOTE: If experiencing difficulties visualizing lambda, place a small piece of ice on the skin and wait a couple of minutes for it to cool down. Then, remove the piece of ice, and the subtle whitening of the skin will allow you to visualize. - Relocate the injection needle to the desired coordinates. In the described protocol, the targeted region was the hippocampus, and the coordinates were as follows: anterior-posterior (AP) +0.85 and medio-lateral (ML) +1.35.
- Use a 90° bent insulin needle to penetrate the skull and create a tiny hole.
- Bring down the injection needle until it has crossed the skull, and zero the dorso-ventral (DV) coordinates. Lower the needle until the desired DV coordinates. In the described protocol, the coordinates were DV −1.1.
- Inject according to the predetermined time intervals.
NOTE: In the described protocol, the exact timings were the following: (i) after going down to the DV coordinate, wait 3 min, (ii) inject 1 µL of volume for 5 min, and (iii) after all the volume has been injected, wait 3 min. - Retract the needle slowly.
- End the procedure.
NOTE: The surgery cannot last more than 15 min to ensure the pup's survival and avoid any damage derived from the anesthesia by hypothermia.- Warm up the pup with the hands until it starts moving before giving it back to the mother.
- Give DOX at a concentration of 1 mg/mL in 0.5% sucrose solution as drinking water for at least 2 days before and 3 weeks post-transplantation (PT) to continue the cell differentiation in vivo.
Access restricted. Please log in or start a trial to view this content.
Results
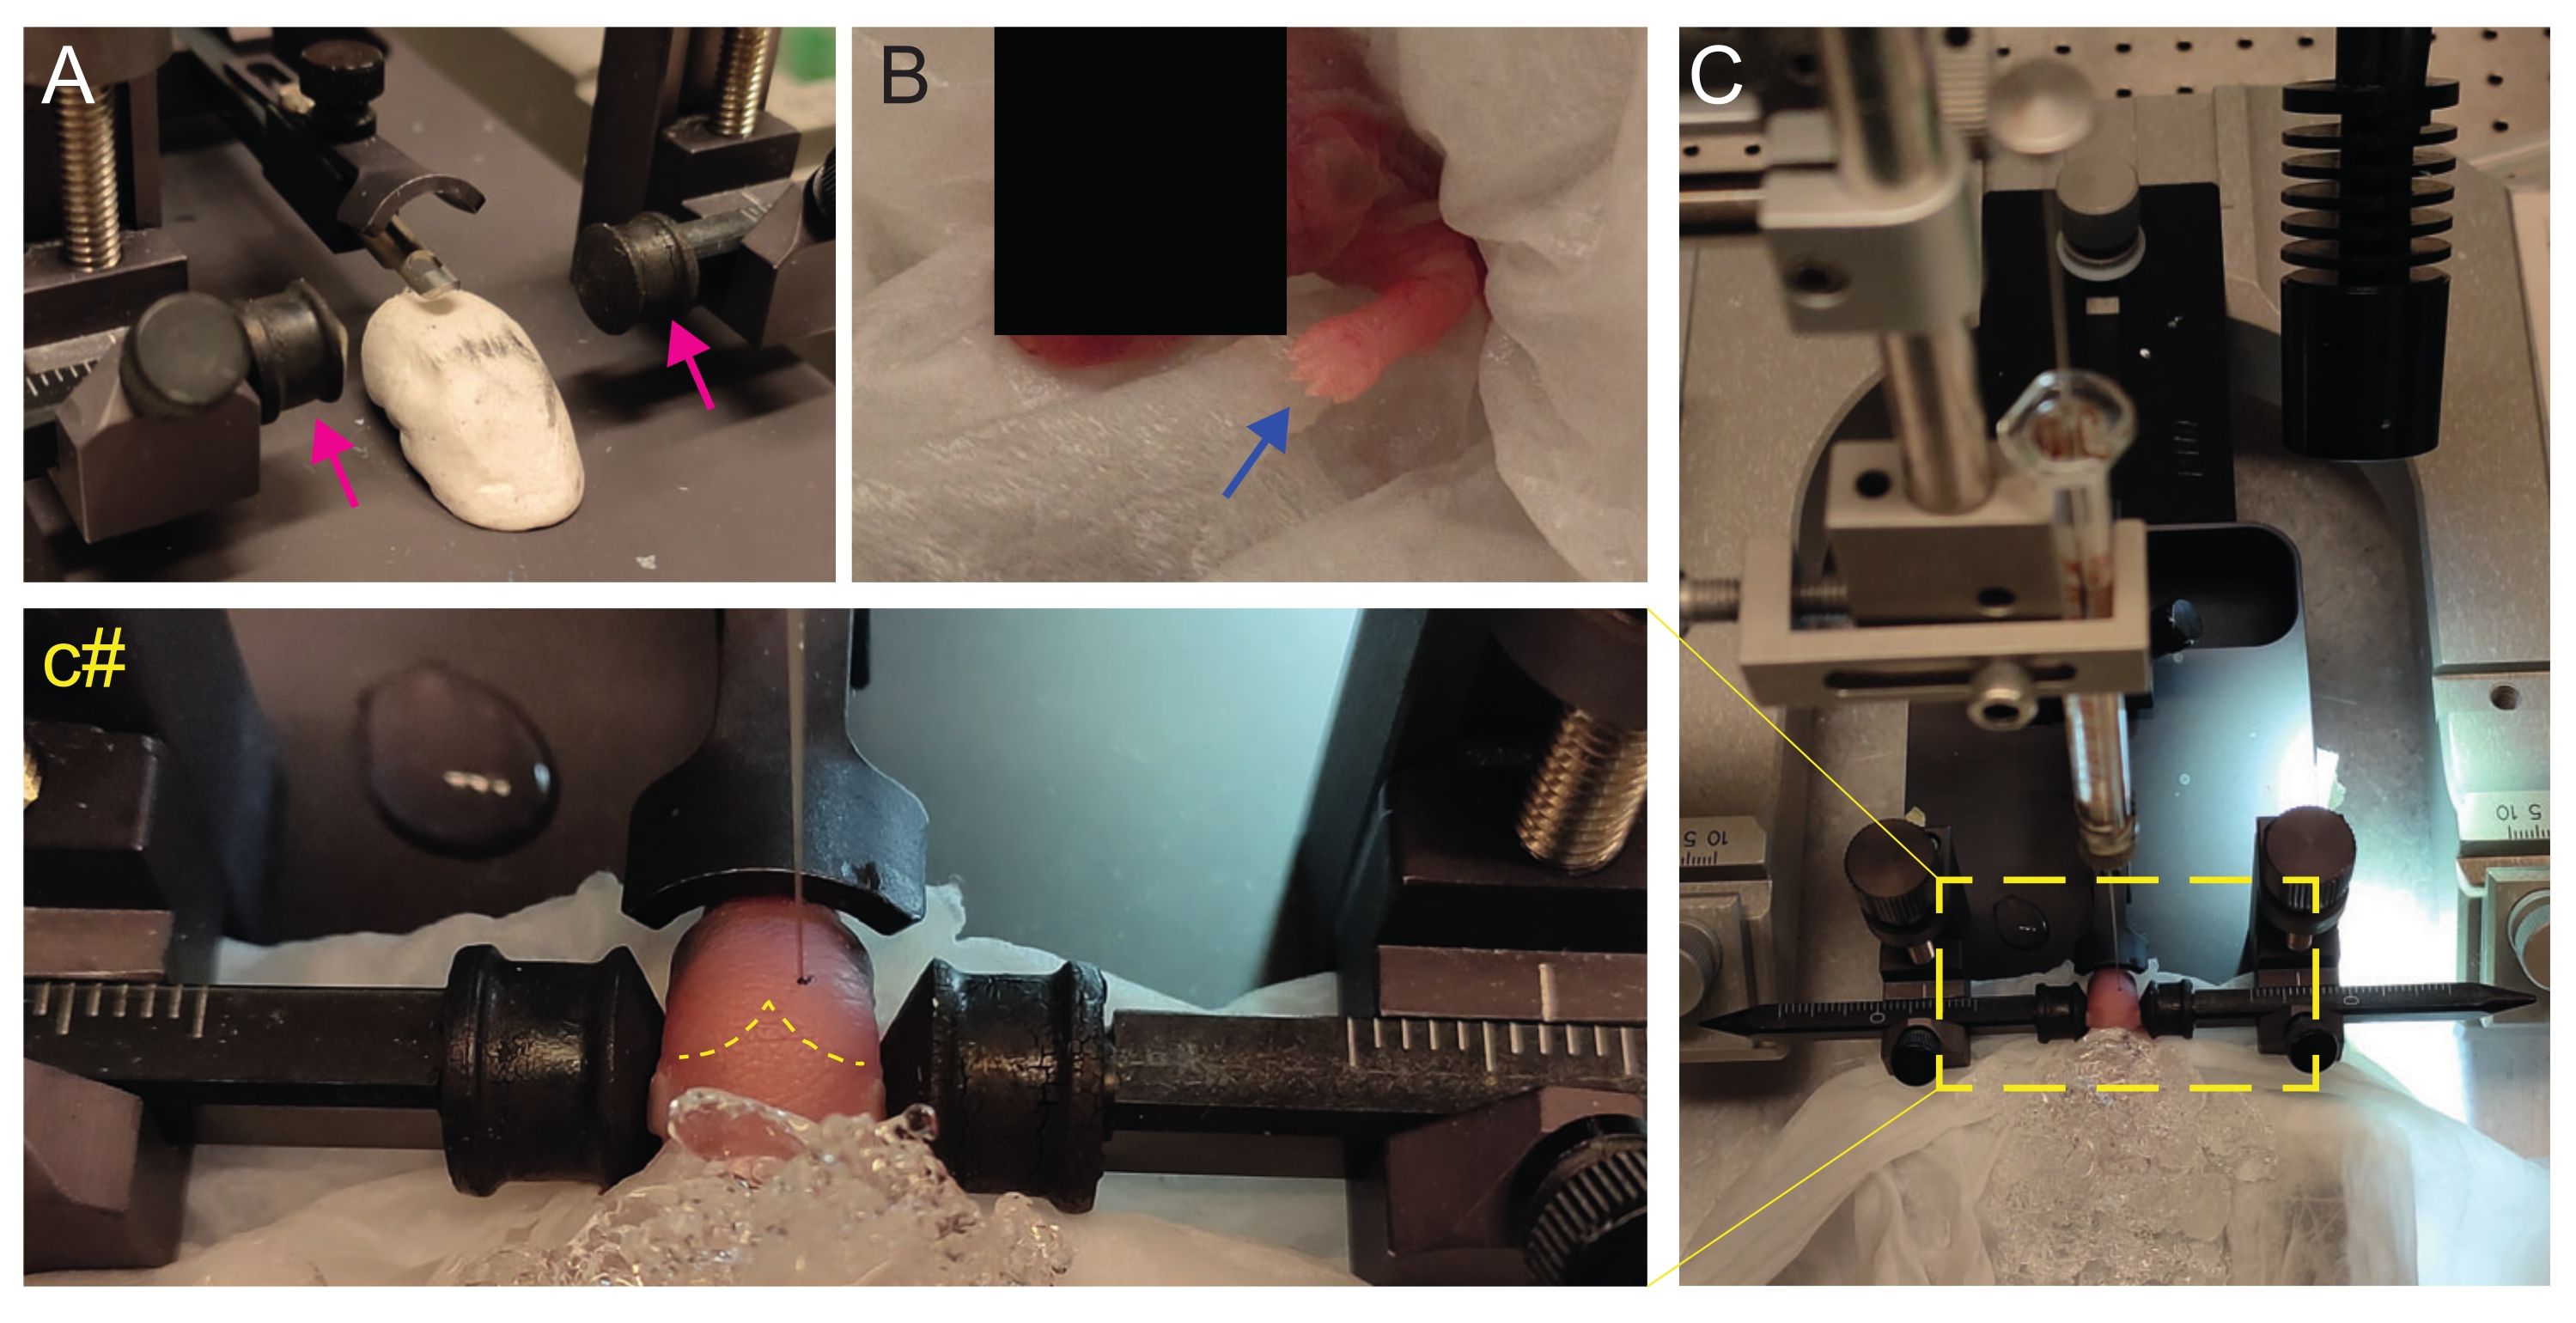
Figure 1: Stereotaxic transplantation in newborn mouse pups at P2. (
Access restricted. Please log in or start a trial to view this content.
Materials
| Name | Company | Catalog Number | Comments |
|---|---|---|---|
| 30 G needle | B Braun | 4656300 | |
| 33 G needle for Hamilton syringe | Hamilton | 7762-06 | |
| B6.129(Cg)-Cntnap2tm1Pele/J | Jackson Laboratory | 17482 | Animal model |
| C57BL/6J | Janvier Labs | Animal model | |
| Digital Stereotax | KOPF | Model 940 | |
| Doxycyclin | Sigma-Aldrich | D9891 | 2 µg/mL |
| Ethanol | Solveco | 70%, 95%, 99.8% | |
| H1 (WA01) ESC | WiCell | WA01 | Human embryonic stem cell line under a MTA agreement |
| Hamilton Syringe | Hamilton | 7634-01 | 5 µL |
| Isoflurane Baxter | Apoteket AB | ||
| Mouse adaptor to stereotax | RWD | 68030 | |
| Puromycin (Dihydrochloride) | Gibco | A1113803 | |
| Tweezer | VWR |
