This video demonstrates the procedure for system setup and data recording to support patient-specific biomarker detection and neurostimulation delivery for treating major depressive disorder.
A subscription to JoVE is required to view this content. Sign in or start your free trial.
Method Article
Neurostimulation System Setup and Symptom Collection for Personalized Treatment of Depression
714 views
⸱
June 18th, 2025
In This Article
Abstract
Protocol
All procedures involving human participants have been performed in compliance with the institutional, national, and international guidelines for human welfare and have been reviewed by the local institutional review board.
1. Device setup for patient at-home recordings
1. Work with a representative from the device company to set four configured channels for acquisition, two from each implanted lead.
NOTE: Each channel records a bipolar recording. Configured channels may use adjacent (e.g., 1-2, 3-4) or interleaved (e.g., 1-3, 2-4) electrode contacts. When leads with 10 mm spacing are implanted, adjacent contacts are typically used. When leads with 3.5 mm spacing are implanted, either adjacent or interleaved contacts are used. This is determined by examining the reconstruction of electrode implant location relative to anatomical targets and examining the amplitude of signals. If adjacent contacts produce low amplitude signals, interleaved contacts are preferable. Each contact can only be used in the montage once.
2. Ensure the patient has fully recovered from surgery following the implantation of the device with cortical and/or depth leads.
3. Connect the telemetry wand to the programmer (clinician tablet) and have the patient hold the wand over their INS or attach it to a tethering hat (custom-made, not part of the device system; see Figure 1).
4. Using the programmer, log on to the patient data management system (PDMS), navigate to the correct patient, and select Programming and then Change ECoG Capture. Set the Capture Window to the maximum of 240 s for the four configured channels using the dropdown selection.
NOTE: The device sampling rate is 250 Hz.
5. On the same settings page, set Reserve Space for magnet reservations to two and to zero for all other trigger types using the dropdown selections. This allows for prioritized saving of two recordings triggered by magnet swipes.
NOTE: Scheduled storage can also be enabled, for automatic and non-prioritized saving of neural recordings at set times of day. These recordings will not be used for determining a biomarker but may be useful for other purposes.
6. Synchronize the newly programmed settings with the patient's INS by selecting the Review & Program button, confirming changes shown in the presented table, and selecting the Confirm Programming button.
NOTE: Detection and Stimulation should both be set to Disabled.
2. Symptom collection during patient at-home recordings
1. Prepare the web-based survey for the patient symptom report (e.g. REDCap), including sliders for visual analog scales of depression (VAS-D), anxiety (VAS-A), energy (VAS-E), and selection responses for each question of the Hamilton depression rating scale (HAMD-6). Ensure the time of survey start and completion is logged.
2. Provide the patient with the unique URL generated by REDCap to access the symptom surveys either via text message or email
3. Procedure for concurrent at-home symptom reports and neural recordings
1. Instruct the patient to set up the equipment, including a remote monitor (patient laptop) and wand, magnet, and device for completing survey (e.g. smartphone, tablet, or computer) (Figure 1). Steps 3.2-3.8 are performed by the patient.
NOTE: Most patients quickly learn this procedure. In-person training sessions while the patient is still in the hospital following device implantation are helpful for familiarization with the components. After the patient has returned home, a video call while the patient is doing an at-home recording can serve as a useful refresher.
2. Turn on the remote monitor and interrogate the device using the wand, downloading electrocorticography (ECoG) recordings that have occurred since the last interrogation to the remote monitor.
3. Swipe the magnet over the INS to trigger a magnet recording.
NOTE: The magnet swipe triggers a recording with a 2:1 before:after the swipe ratio. In the case of an ECoG capture that is programmed to 240 s, this means that 160 s of data prior to the swipe and 80 s following the swipe will be stored.
4. Start a timer. Use the unique URL to complete a symptom survey.
5. After 4 min have elapsed or the patient finishes the survey (whichever happens later), swipe the magnet over the INS again to trigger another recording.
6. After at least 80 s, use the wand to interrogate the device again, transferring the data from the two magnet swipes to the remote monitor.
NOTE: Due to the limited on-board memory of the INS (up to 53 channel-minutes of data, depending on configuration 13), it is desirable to immediately transfer these ECoG recordings to the remote monitor so that they are not overwritten by subsequent recordings.
7. Complete steps 3.1-3.6 at least twice daily.
8. At least once daily, connect the remote monitor to the internet via ethernet and select Transfer Data and Synchronize on the remote monitor to send data to the cloud.
Access restricted. Please log in or start a trial to view this content.
Results
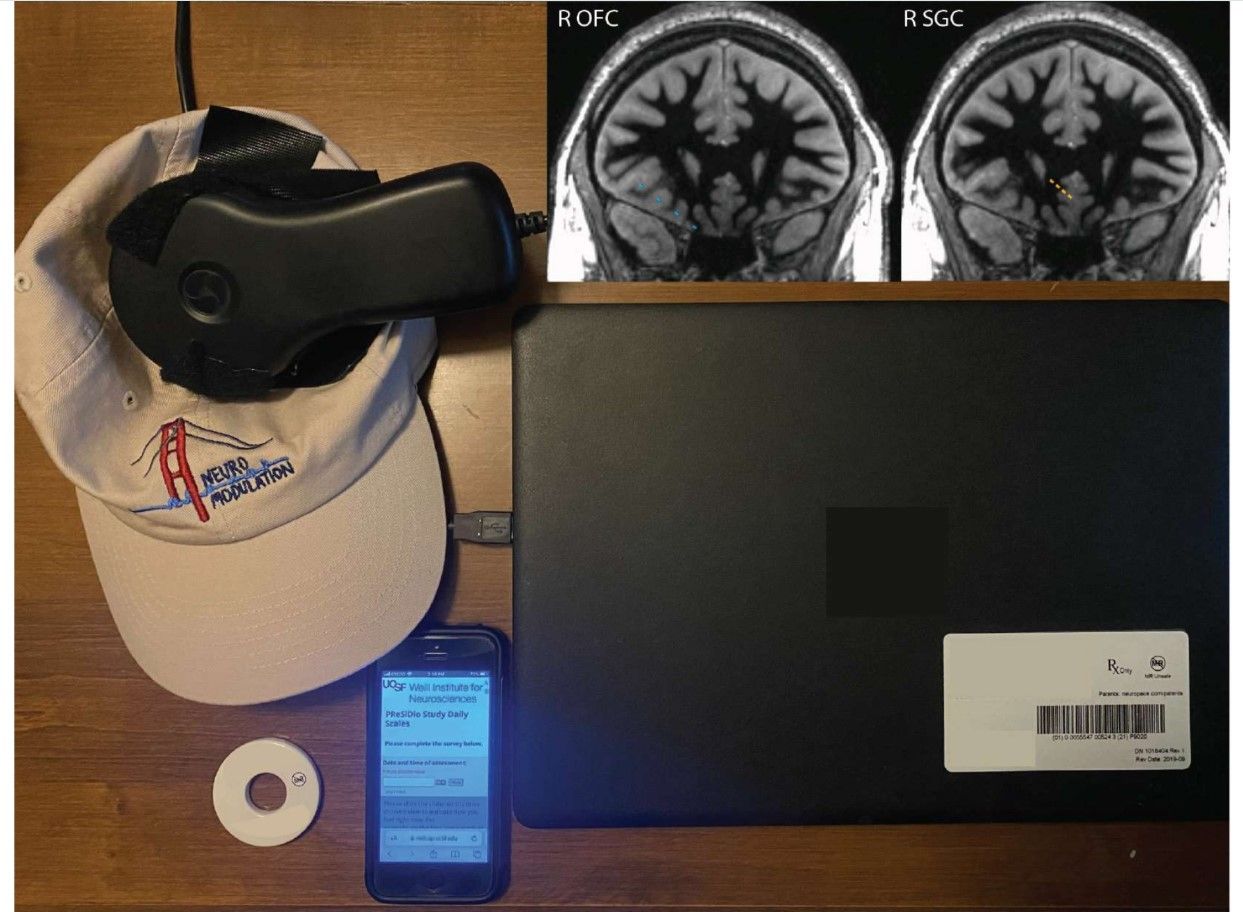
Figure 1: Patient equipment for at-home recordings. A remote monitor, wand tethered to a hat, ma...
Access restricted. Please log in or start a trial to view this content.
Materials
| Name | Company | Catalog Number | Comments |
|---|---|---|---|
| Depth Lead | Neuropace | DL-330-3.5 | 30 cm length, 3.5 mm contact spacing |
| Depth Lead | Neuropace | DL-330-10 | 30 cm length, 10 mm contact spacing |
| Depth Lead | Neuropace | DL-344-3.5 | 44 cm length, 3.5 mm contact spacing |
| Depth Lead | Neuropace | DL-344-10 | 44 cm length, 10 mm contact spacing |
| Hat with velcro | Self-assembled | NA | Optional |
| Jupyter Notebook | Project Jupyter | NA | |
| Magnet | Neuropace | M-01 | |
| Programmer | Neuropace | PGM-300 | Clinician tablet |
| Python 3.10 | Python | NA | |
| Remote Monitor | Neuropace | 5000 | Patient laptop |
| Responsive Neurostimulation System (RNS) | Neuropace | RNS-320 | |
| Wand | Neuropace | W-02 |
