Summary
A rapidly-deployable, off-grid laboratory has been designed and built for remote, resource-constrained global settings. The features and critical aspects of the logistically-enhanced, expandable, multifunctional laboratory modules are explored. A checklist for a basic laboratory workflow and a protocol for a respiratory viral diagnostic test are developed and presented.
Abstract
An uptick in recent pandemics (Ebola, Zika, MERS, influenza, etc.) underlines the need for a more 'nimble,' coordinated response that addresses a multitude of issues ranging from transportation, access, facilities, equipment, and communication to provider training. To address this need, we have developed an innovative, scalable, logistics-enhanced, mobile, laboratory facility for emergencies and epidemics in resource-constrained global settings. Utilizing a background in clinical operations as an academic medical center, we designed a rapidly-deployable, modular BSL-2 and BSL-3 facility with user-friendly software for tracking and management of drugs and supplies in remote regions during epidemics and outbreaks. Here, we present our intermodal, mobile, expandable shipping-container laboratory units. The design of the laboratory facilitates off-grid usage by minimizing power consumption and allowing alternate water sources. The unit's information communication technology (ICT) platform provides (i) user-friendly tablet-based documentation, (ii) enhanced tracking of patients and supplies, and (iii) integrated communication onsite with built-in telehealth capabilities. To ensure quality in remote environments, we have developed a checklist for a basic laboratory workflow and a protocol for respiratory viral diagnosis using reverse-transcription polymerase chain reaction (RT-PCR). As described, this innovative and comprehensive approach allows for the provision of laboratory capability in resource-limited global environments.
Introduction
Rapid diagnostics is a critical instrument in timely viral infection control, especially if early symptomatology is indistinguishable to a variety of infection diseases. The recent Ebola outbreak (2014-2015) in West Africa1,2, Zika virus epidemics (2015-2016) in Asia and Latin America3,4, the emergence of the Middle East Respiratory Syndrome (MERS) coronavirus infections5,6, and the unusually deadly flu (influenza) epidemics (2017-2018) in the U.S.7,8 uncovered the need for rapidly-deployable, laboratory facilities that address a multitude of issues from transportation, access, facilities, equipment, and communication.
Off-grid capability (autonomous power and water supply, etc.) is crucial in rural, resource-constrained global settings9,10,11. Our experience in clinical operations and global programs at Baylor College of Medicine was used to design and build a container-based mobile laboratory with capabilities for easy deployment, set-up and multifunctional usage (BSL-2 and BSL-3). Images of this versatile, logistically-enhanced laboratory facility is shown in Figure 1.
This rapidly-deployable, laboratory facility has an expandable design similar to the previously described container clinic (The 'Emergency Smart Pod')12,13,14, developed by Baylor College of Medicine and sponsored by USAID. A single packed unit (in Transport Mode) has the dimensions of 9 feet 9 inches x 8 feet x 8 feet (Figure 1A, B), and expands to an area of 170 square feet (15.75 m2) (Figure 1C, D). The unit can be deployed by two to four people in less than ten minutes.
The remote laboratory is built for a BSL-2 lab facility (Figure 2A) with a separate, modular, attachable, BSL-3 unit (Figure 2B) designed for work with infectious agents that may cause serious or potentially lethal disease through inhalation15. The connectivity of the two laboratory modules enables optimization of experimentation workflows, sharing of resources, and cost savings (Figure 2C-E).
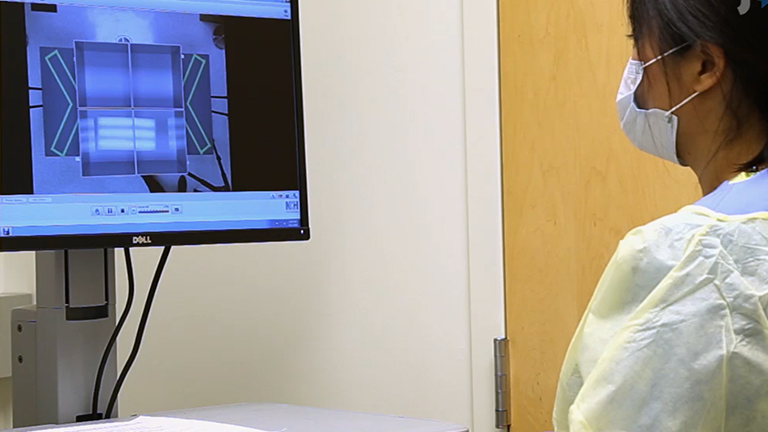
The modules are air-tight and water-tight to create a comfortable, energy efficient mobile shelter. Heating, ventilation, and air conditioning (HVAC) system is used for centralized and temperature-controlled units. In general, the design of the laboratory units minimizes power consumption by usage of their own alternate power sources such as solar panels and/or an independent electrical generator. Each unit includes a sink and eyewash station, electrical power and water connectors (Figure 3A-C). The ICT platform delivers an optional, tablet-based (Android phone/Tablet or iPhone/iPad) documentation app for supply tracking and laboratory result documentation (Figure 3D) developed in partnership with Baylor's Information Technology (IT) research group that is well-experienced in working in remote environments with limited connectivity. The system can function using cellular or wireless signals, and allows documentation without connectivity, with immediate backup or transmission to a secure-cloud based server when connectivity is re-established.
The laboratory has several key infection-control features including: (a) negative pressure air flow, (b) a glove box or biosafety cabinet, (c) a health risk management system: a germicidal ultraviolet (UV-C) lighting system using 4 hierarchies of defense proven to eliminate 99.7% of pathogens that cause healthcare-related infections. The facility is easily disinfected using hydrogen peroxide or sodium hypochlorite (bleach) systems for efficient and effective decontamination.16
The assurance of quality laboratory results depends on a commitment to assess all aspects of the entirety diagnostic testing process. Here, we present a checklist for the BSL-2 and BSL-3 laboratory workflow, and a protocol for rapid respiratory virus diagnostic test. The proposed diagnosis of viral diseases relies on the detection of viral RNA or DNA in specimen (nasal wash, blood, stool, and urine, etc.) through real-time reverse-transcription polymerase chain reaction (RT-PCR). The ability to rapidly estimate viral loads in a specimen makes PCR an efficient tool for viral disease screening17,18. The implementation of novel, molecular diagnostic assays allows expansion of diagnostic capabilities for viruses such as Ebola19,20,21, influenza8,22, and tuberculosis (TB)23.
The goal of this work is to validate a novel modular and rapidly-deployable laboratory facility and provide a training guide for laboratory personnel working in remote, low-resource environments during an epidemic, natural disaster or other emergency relief situation. Here, we present a protocol for respiratory influenza diagnosis in this innovative, portable laboratory.
Protocol
1. Installation
NOTE: Only 2-4 people are needed to deploy the "Lego-like" laboratory unit. Optimally, 4 individuals would be used to deploy, but it is possible with only 2.
- Utilize a fork lift truck (Figure 1A,B) or other suitable lifting device to handle the container. Use a fork lift truck with at least seven tons of lifting capacity to handle the two types of containers24.
- To set up a laboratory unit, select a patch of approximately 90 x 60 square feet (27.4 x 18.3 m2) on a flat landscape to ensure no obstructions hinder the proper layout. Ensure that the site has well-drained soil to assure site drainage as this may cause potential problems with water dissipation after rain fall. Use grounds that have been previously leveled and that are hard compacted soil of a minimal compressive strength of 10 kN/dm2. The surrounding area should permit access to equipment needed for unloading the unit from its conveyance device and accommodate the support equipment necessary to accomplish the task.
- Place the unit or units in its 'Transport Mode' in the center of selected site and adjust the level. Each unit is equipped with four leveling jacks to allow deployment on a site that has a maximum grade of 6.5% (~4 degrees). The minimum elevation for the containers is ~ 6 inches to ensure that the floor drains and discharge pipes work properly. Do not extend jacks more than 12 inches. Attach the support bracket to the arm of the jack. Ensure that the container is level by placing a bubble leveler at the center of each bottom rail. Do not expand the unit until it has been properly positioned!
- Expand the unit by opening the panels for full functionality. First locate the two-piece support pole. Connect the support pole so that its height is almost as high as the container unit. The pole allows the user to open the panel and support the weight of the roof panel as the side doors are opened. There is a safety clip that acts as a pin to keep the panels locked. Remove the safety clip first, then lift and pull the cam lock pin from the hole. Place the pin behind the lever and out of the way of the cam lock lever located on the bottom (expandable) sides of the container.
- Raise the roof Panel 1 considering that this panel has gas struts and once the panel doors are unlocked, the struts will release. This will allow for the user to raise the roof (Panel 1) using the two-piece support pole. Move the support pole's tip under the roof panel to temporarily support it (Figure 4A).
- While holding up the roof panel with the support poke, find the safety chain, located on top left side of the container. With the assistance of 2-3 individuals, carefully drag down Panel 2 until the safety chain is straight, holding the weight of the panel 2 and has engaged.
- Connect the winch strap belt to the lug mount by hand by wrapping it around the exterior of the gas strut. Note if there is no winch tool, the previous step can be manually completed with at least two people on each side of the panel manually holding and lowering it.
CAUTION: The weight of the panel is 260 lb!
- Ensure there are no people or items in the way of Panel 2 and using the winch and drill, proceed to lower the panel (Figure 4B). When Panel 2 is completely lowered, disconnect the winch strap and reel it back into the winch. Remove the winch and place it on the opposite side of the container in preparation for use. Both sides of the unit are identical and follow the same steps above for the other side of the unit.
- To complete deployment of the first side, reach down to the Panel (which is currently the floor) and with at least two people on each side, manually lift Panel 3 upward into place as the door and front wall of the side (Figure 4C). The two people will remain to hold Panel 3, while the third person removes the support pole.
CAUTION: No one should be inside the unit or under the roof until the Panel 3 wall is in place! - From the inside of Panel 3, locate the two latches and lock them into place using the safety strap. Make sure the black roof panel rubber gaskets are pulled out to face the inside of the units. This must be done to prevent rain and other water penetration into the unit.
- From the inside of the container, unlock Panel 4. Once unlocked, push out Panel 4 (Figure 4D) so that it swings open like a door. Lock the two safety latches on inside wall. Unlock Panel 5 and repeat the same steps for Panel 4. Secure this Panel with same internal safety latches. Once the entire unit interior has been locked, re-tighten the turnbuckle until the floor and end walls are sealed.
- Once both sides of the container are safely expanded, check the jacks and make any necessary adjustments from shifting that may have occurred. Check the shelter to be level weekly. After extreme weather (rain or wind) inspect jacks on containers and adjust accordingly.
- Expand the second container if the connectable laboratory modules are planned for use (Figure 5).
- Connect the units to power source and water supply. A detailed instruction on installation of a diesel generator connected to the units through a breaker box can be found in the according manual24.
NOTE: The remote laboratory unit is now deployed. The inner non-collapsible volume of the unit allows to store minimum of the equipment and laboratory supply necessary for particular diagnostic tests. Installation of pressurization system for BSL-3 module is described in detail24 and requires additional quality control.24
2. Checklist for personal protection and basic laboratory workflow
NOTE: An error in any of the general safety and laboratory testing requirement phases may invalidate the results of the entire testing process.
- Before preparing to enter the installed laboratory unit, ensure that all BSL-2 or BSL-3 safety requirements are accounted for: dressing with proper personnel protective equipment (PPE), washing hands, wearing gloves, and decontaminating any workspaces that are to be used.
- Follow the checklist in Table 1 that contains safety requirements for personal protection during tests run in the lab BSL-2 and the BSL-3 module (the assembled glove box room - negative pressure and PCR room - positive pressure).
- Decontaminate all work space and supplies in the laboratory. If planning to use sodium hypochlorite solution (0.5%), also known as liquid bleach, to decontaminate the workspace and supplies, also use 70% ethanol to clean all areas exposed to bleach, as bleach can mix with other chemicals in the workspace to create toxic fumes. Dispose all bleach products into their own designated waste bin.
- Before beginning to work in the laboratory unit, become familiar with its arrangement and layout. Strict rules apply for processing samples in the glove box (GB) room. The GB room is negative pressure! To operate a glove box, check the manufacturer's instruction. Multiple sources provide detailed tutorials on glove box operation25.
NOTE: The purpose of this assay is to extract and purify ribonucleic acid (RNA) or deoxyribonucleic acid (DNA), if present, from specimens. The extracted RNA/DNA will be tested by a real-time RT-PCR to detect the presence or absence of targeted viral pathogens - influenza (INF).
3. Rapid influenza virus diagnostics by RT-PCR in a BSL-2 laboratory facility
- Receive and register
- Apply the checklist for PPE (see Section 2). INF is a Class 2 agent requiring BSL-2 practice. PPE appropriate for BSL-2 practice is required. Additionally, wear safety glasses and cuffed sleeve lab coats to minimize potential skin exposure.
- According to World Health Organization (WHO) recommendations26, use sterile Dacron or rayon swabs with plastic shafts for sampling from the respiratory tract.
NOTE: Cotton or calcium alginate swabs, or swabs with wooden sticks may contain compounds that inactivate some viruses and inhibit PCR testing26,27. - As sample swabs are taken from patients, transport them to the laboratory facility from the field or clinic. Transfer samples via the pass-through window; this window cannot be opened from both sides.
- In the pass-through window, spray tubes containing samples with bleach for 1 min followed by 70% ethanol and wipe dry in order to provide adequate decontamination before they enter the laboratory unit. Following the submersion, the lab technician inside the unit will open the pass-through window and collect the samples from the bleach container to be registered. Usually, the person passing the sample and the person extracting the sample are not the same.
- Open the pass-through window and collect the samples to be registered. Wipe down any samples that were disinfected in bleach and ethanol. Wipe down the interior of the pass-through window with bleach followed by 70% ethanol solution. Register a sample within interactive tablet-based system or a laptop. Identify a sample with the following information:
- Collection date
- Onset date
- Patient age and sex
- Specimen type (e.g., nasal swab)
- Unique identifiers
- Other pertinent information - Use barcodes for labeling tubes. Add barcode to each sample tube and four empty tubes designated to aliquots. Move the samples to the vent hood. Scan a barcode on each tube and make sure that the proper sample identification information appears on the tablet-based system or laptop screen. If barcodes are not available, use an alcohol resistant marker. Always mark the vial itself, never the cap as this can get switched during handling! Complete the registration process.
- Sample aliquot
- Once test tubes have been labelled, use a certified Class 2 biosafety cabinet to handle specimens and make aliquots of samples. One aliquot can be used for immediate testing and the others retained for reference purpose or retesting.
- As specimens arrive with nasal swab tip in the viral transport medium, stir up the swab tip in the medium for 30 s and squeeze it against the side of the vial. Then remove it from the medium and dispose of it with a biohazardous waste protocol (appropriately discard, autoclave or hang into 1:100 chlorine solution).
NOTE: The smallest volume of medium that should be stored is 0.5 mL. Thus, a 3 mL sample can be divided into six aliquots (sub-samples). Use 1 mL cryo-storage tube for each sample of 0.5 mL to provide extra volume for frozen medium. - When taking aliquots, use fresh sterile or disposable pipettes for each sample and discard them into biohazardous waste containers in order to avoid cross-contamination. Make sure every tube is tightly sealed and closed.
- Utilize one aliquot per specimen for immediate extraction and store any other aliquots in the freezer (at -80 °C as it is a respiratory specimen) for future use.
- Before moving to the work station, clean all workspace surfaces and equipment with bleach followed by 70% ethanol solution.
- Extraction and purification
- To assure quality of testing, move the barcoded PCR sample aliquots from specimen handling area to the work station (BSL-2 safety cabinet) designated for extraction. This safety cabinet has a separate set of pipettes for handling of the sample.
- Use the viral RNA mini kit for extraction of RNA samples. Follow the manufacturer's instructions for purification of viral RNA by spin protocol. Prepare master mix according to the number of samples that need to be extracted. Keep the sample and lysis buffer master mix at room temperature.
- Prepare the number of samples that need to be extracted. Label the 1.5 mL micro-centrifuge tubes with the barcode numbers or unique identifier.
- Set the pipette to 560 µL. Apply a clean pipette tip. Add 560 µL of the lysis buffer to each labelled tube. Discard tip. Apply a clean pipette tip. Add 140 µL of the sample. Discard old and apply a clean pipette tip. Repeat with the other sample. Apply a clean pipette tip. Add 140 µL buffer to negative control tube. Close each tube securely.
- Pulse-vortex sample aliquot 1 with the lysis buffer for 15 s. Repeat with sample aliquot 2 and the control tube. Micro-centrifuge each sample for 5 s. Incubate the samples for 10 min at room temperature.
- After 10 min of incubation, re-centrifuge the tubes to remove any drops from inside of each tube lid. Add 560 µL of ethanol solution to sample. Change the pipette tip. Repeat with any remaining or additional samples. Close each sample tube securely and pulse-vortex each sample for 15 s. Micro-centrifuge the samples for 5 s.
- Apply the mixture to the spin column. Obtain clean 2 mL collection tubes. Add spin columns, and label them to match the samples. Transfer 630 µL of sample to matching column, accordingly.
- Secure caps and move to the centrifuge. Evenly distribute the samples in centrifuge. Centrifuge at 6,000 × g for 1 min to remove the lysis buffer. Return to the work station. Replace collection tubes. Add the remaining lysis buffer and repeat the centrifugation step. Discard the original aliquot sample tubes.
- Dispose the eluate and wash the spin column with two buffers. Apply 500 µL of Buffer AW1. Repeat with every sample. Secure caps of every sample and centrifuge at 6,000 × g for 1 minute. Repeat with the second Buffer AW2 and centrifuge at 20,000 × g for 3 min.
- Finally elute the RNA by adding elution buffer. Place the column into a clean 1.5 mL tube, open the column and add 60 µL of Buffer AVE. Incubate at room temperature for 1 min and centrifuge at 6,000 x g for 1 min. The samples are now ready for PCR analysis.
- PCR amplification and detection
- Perform the PCR amplification in a separate area designated for PCR. Carry out the PCR amplification of the viral target using PCR protocol for one step procedure according to the manufacturer's instructions. Note, a master mix is made using viral specific primers, probes, 2x RT-PCR buffer and RT-PCR enzyme. Add the master mix to plates or tubes and then add and mix individual samples (see Section 4.4).
- Transfer the plate to the PCR machine and run according to the viral target amplification conditions. Once samples are loaded onto the PCR instrument it takes approximately 90 minutes to complete the run.
- Maintenance after the equipment usage
- Perform regular and periodic maintenance after the equipment usage according to the Table 2.
4. Rapid influenza virus diagnostics by RT-PCR in a BSL-3 laboratory facility
NOTE: Under BSL-3 conditions, the experimental protocol will stay the same, but safety measures will take precedence above anything else. Before entering the BSL-3 laboratory, look through the transparent window to be sure that negative pressure has been established in the glove box unit. It will be evident that negative pressure has been established when a pink ball in a wall is visible.
- Receive and register
- Once negative pressure has been established, open the door and enter the unit. Immediately wash hands and then proceed with the PPE. Apply the checklist for PPE and workflow BSL-3 (see Section 2).
- Proceed to putting on PPE in the following order: under gloves, gown, shoe covers, mask, face shield, second pair of gloves. Wearing a full gown that protects the whole body is recommended.
- Turn on the machine and allow pressure in the glove box to stabilize. Use a bleach spray solution to decontaminate all areas and supplies to be used inside and outside the glove box. Dispose of bleach waste products into a bleach only container. Use 70% ethanol solution to clean off any areas for bleach has been used.
- Transfer the sample via the pass-through window.
NOTE: Prior to being dropped at pass through window, disinfect tubes containing samples by submerging in a hypochlorite bath for 1-2 min. Particularly, spray samples with a bleach solution and leave alone for at least 1 min and pass-through before receiving them inside the BSL-3 unit. The person passing the sample from outside and the person receiving, extracting the sample inside BSL-3 laboratory should not be the same. - Receive the samples inside the BSL-3 unit and clean them before proceeding to the registering and labeling steps.
- Register a sample with the interactive tablet-based system or a laptop. Identify a sample with the following information (see Section 3.1.5).
- Use barcodes for labeling tubes. If barcodes are not available, use an alcohol resistant marker.
NOTE: Always mark the vial itself, never the cap as this can get switched during handling!
- Sample aliquot
- Once samples are registered and tubes has been labeled, place the samples into the certified glove box via the air locked tray to retrieve the samples from inside the glove box. Close the door. Then open the other door through the glove box to retrieve the samples. Do not open both doors at once. Open and close each door in two different steps for safety precautions. Turn on UV-C lighting.
- Once samples have been safely moved to the glove box interior, follow the steps previously described for creating sample aliquots in a glove box. One aliquot of sample can be used for immediate testing and the others retained for reference purpose or retesting. Specimens arrive with nasal swab tip in the viral transport medium. Take specimens and put one into each vial. Stir the swab tip in the medium for 30 s and squeeze it against the side of the vial before removing it from the medium and disposing it utilizing a biohazardous waste protocol (appropriately discard, autoclave or hang into 1:100 chlorine solution).
NOTE: The smallest volume of medium that should be stored is 0.5 mL, use 1 mL vials for this purpose. Thus, a 3 mL sample can be divided into six aliquots (sub-samples). - Use fresh sterile or disposable pipettes for each sample and discard them as biohazardous waste. Once samples are aliquoted, move the samples in the airtight container. Close vials with protection and remove from the glove box.
- Within the glove box, close the biohazard waste bag and prepare a new waste bag to avoid cross contamination. Decontaminate the glove box workspace applying bleach for 5 min and 70% ethanol solution afterwards.
- Utilize one aliquot per specimen for immediate analysis and store others in freezer at -80 °C as it is a respiratory specimen. After decontamination retain one aliquot for testing, move all the samples out of glove box for storage in -80 °C freezer.
- Extraction and purification
- After decontamination, move the barcoded sample aliquots needed for PCR analysis from the specimen handling area back into the glove box.
- In the glove box, perform all the lysis steps for the extraction procedure. Use the viral RNA mini kit for extraction of RNA samples according to the manufacturer's instructions. Follow the step-by-step instructions for purification of viral RNA by spin protocol in the manufacturer's instructions.
- Prepare the number of samples that need to be extracted. Label the 1.5 mL micro centrifuge tubes with the barcode numbers or unique identifier.
- Add 560 µL of the lysis buffer to 140 µL of the sample and pulse vortex. Incubate for 10 minutes at room temperature.
NOTE: The inactivation procedure can vary depending on the type of BSL-3 pathogen that is being extracted and in some cases further inactivation may be necessary. - After the lysis step, tightly seal the caps on each sample and place into the pressurized air locked passage (if the centrifuge is placed outside the glove box). Transfer the lysed samples into biosafety cabinet for the remainder of the procedure.
NOTE: The procedure for extraction and purification of RNA can be completed in the glove box or in a glove box followed by bio-safety cabinet depending on the BSL-3 pathogen and protocols required. - Make sure to decontaminate the workspace and supplies in the glove box again using bleach, and 70% ethanol solution to clean all areas exposed previously to bleach.
- Follow steps in Section 3.3.6 - 3.3.10 for washing and purification of the RNA.
- After extraction, transfer the samples to the pass-through window for PCR analysis.
- After samples has been removed and transferred, decontaminate the laboratory workspace outside the glove box, according to Section 2.
- Before removing PPE wait until air circulation in the unit has safely reached the proper number of filtering cycles before beginning to remove the PPE. Immediately after removing and disposing of all PPE into the PPE waste container, proceed to washing hands in the laboratory with soap and water before exiting the unit, according to Section 2.
- PCR amplification and detection
NOTE: The PCR amplification is performed in a separate area designated for PCR and connected with the glove box area via pass-through window. The workspace and supplies have to be decontaminated prior to a test.- Remove the extracted RNA samples from the pass-through window.
- Perform the PCR amplification of the viral target using one-step PCR protocol. Prepare a master mix using viral specific primers, probes, 2x RT-PCR buffer and RT-PCR enzyme. Use a 1.5 mL tube with the following component for each targeted assay: water, primers and probes, 2x buffer and RT-PCR enzyme. Vortex and spin the master mix.
- Aliquot the master mix into each of the strip tubes. Return the PCR kit to storage at the recommended temperature once the master mix has been prepared.
- Add the individual samples to each of strip tubes using a separate tip between each strip tube. Spin the sample plate or tubes at 1,500 rpm for 1 min. The samples are ready to be loaded onto the real-time PCR unit.
- Transfer the plate with samples to the PCR instrument and run the machine according to the viral target amplification conditions. It takes approximately 90 min to complete one run.
- Before collecting the results and leaving the laboratory, remove PPE and adequately decontaminate each workstation and preparation for the next diagnostic test, according to Section 2.
- Maintenance after the equipment usage
- Perform regular and periodic maintenance after the equipment usage according to the Table 2.
NOTE: The overall diagnostic turnaround time is approximately 4 hours. Extraction time and PCR set up time can vary depending on the number of samples, and the diagnostic test can take 4-5 hours or more, correspondingly.
- Perform regular and periodic maintenance after the equipment usage according to the Table 2.
Representative Results
The goal of this study is to demonstrate that the proposed BSL-2 and BSL-3 mobile laboratory facilities provide an adequate environment allowing respiratory virus diagnostic tests with representative results identical to tests performed in high-quality stationary laboratories. The laboratory facilities are designed to comply with the test requirements given in Occupational Health and Safety (OHS) recommendations. As soon as the remote laboratory facility is deployed (Figure 4) and all equipment and supplies are installed (Figure 5), laboratory tests can be run.
In accordance with laboratory standard operating procedures, PPE (lab coats, protective shoes, gloves, advanced mask, protective eyewear, etc.) appropriate for BSL-2 practice is required. For BSL-3 practice, the PCR laboratory module of negative pressure is equipped with a certified glove box. The laboratory units are upgraded by external pass-through windows to protect personnel at the step of sample receiving. The registration process can be simplified with previously developed tablet-based application (Figure 3D). Other acceptable applications that run on a laptop can be used as well.
This particular respiratory virus diagnostic test can be performed in the connected laboratory modules to separate steps of the diagnostic procedure on purpose to avoid contamination or potential interference between biochemical reagents, which may affect the testing results. To maximize the quality of diagnosis, the rapid diagnostic test practice utilizes (i) both the basic laboratory BSL-2 and the traverse connected PCR room (Section 3) or (ii) the GB and PCR rooms connected by pass-through window (Section 4). The diagram of the proposed laboratory workflow is presented on Figure 6 and emphasizes personal protection. The diagram recognizes the importance of each indicated step for personnel protection, especially if laboratory staff in remote areas is minimally trained.
The rapid diagnostic test of influenza is accomplished via the RT-PCR technique. The procedure contains four main steps. Note that individual workspaces are assigned for each stage of the protocol.
The first step is to obtain a sample and sub-divide it into several aliquots. The aliquots can then be marked with barcodes to improve effectiveness of data control and stored in the freezer for further investigations. The second step is to inactivate a sample in lysis buffer by centrifuging and heating. The first and second steps must be carried out in biosafety cabinets. Utilize individual pipette sets and equipment. A PCR test is proposed to be performed in the PCR room, if available. The third step is the documentation of results. Step four is the maintenance after the equipment usage, and reminder of personnel protection at the end of experiment.
If the specimen is expected to be classified as BSL-3+ (e.g.,Ebola, Zika, MERS, TB) the glove box facility must be used. In the remote laboratory, the GB room has its own pass-through window to receive specimens and a laptop or tablet for sample registration. The sample aliquot and virus inactivation must all be performed in the glove box chamber. UV-C lighting is recommended to avoid contamination during procedure. After inactivation of a sample, further steps for protocol are similar to the basic laboratory BSL-2 and BSL-3 test and follows Checklist Part III (Table 1, Figure 6).

Figure 1. Laboratory facility prototype. (A, B) Transport mode; (C) Deployed mode: outside; (D) Deployed mode: interior. Please click here to view a larger version of this figure.

Figure 2. Schematics. (A) The basic laboratory BSL-2; (B) The BSL-3 module includes the glove box and PCR laboratories, which have a common pass-through window for protected specimen transfer; (C) Connected laboratory facilities (A) and (B) with shared utilities. (D,E) Photographs of the connected units from opposite sides. Please click here to view a larger version of this figure.

Figure 3. (A) Interior of the BSL-3 facility has (1) a pass-through window, a sink and (2) an eyewash station at the inlet; (B) Electrical power connectors, (C) Water connectors; (D) Tablet-based software for supply tracking and laboratory result documentations. Please click here to view a larger version of this figure.

Figure 4. Deployment of the laboratory facility. Instruction for panels unfolding on one side of the unit as illustrated (A-D). Please click here to view a larger version of this figure.

Figure 5. Schematics of the connectable laboratory: (A) BSL-2 module 1; (B) Glove Box and PCR module 2. Please click here to view a larger version of this figure.

Figure 6. Flow chart for a respiratory virus diagnostic RT-PCR test in the remote laboratory facility. Please click here to view a larger version of this figure.
| Remote Laboratory BSL-2 | Remote Laboratory BSL-3 |
| Part I | Part I |
| i. Lab tech to enter through door labeled entrance and put on lab coat, which is hanging on rack next to entrance door. Open shoes are prohibited, advanced mask and protective eyewear are encouraged. | i. Lab tech to look into Glove Box window from outside of unit to insure negative pressure is activated. (Pink Ball should be visible in the unit to show the negative pressure is working). |
| ii. Lab tech to wash hands in sink, put on disposable gloves and begin with intake of samples. | ii. If negative pressure is working, lab tech to enter through only door and put on lab coat, which is hanging on rack next to entrance door. Open shoes are prohibited, advanced mask and protective eyewear are desirable. |
| iii. Samples that were dipped in hypochlorite bath prior to being dropped at pass-through window are sitting in pass through for lab tech. | iii. Lab tech to wash hands in sink, put on disposable gloves, PPE and begin with intake of samples. |
| iv. Received in sample reception. | iv. Samples that were previously dipped in hypochlorite bath prior to being dropped at pass through window are sitting in pass through for lab tech. |
| Part II | v. Received in sample reception. |
| v. Depending on diagnostic procedure, specimens moved to biosafety cabinet and inactivated. | Part II |
| vi. Specimens prepped for microscopy, centrifuge, or ROTs. | vi. Specimens inactivated in Glove Box. |
| vii. Appropriate diagnostic tests run. | vii. Specimens executed for nucleic acid isolation. |
| viii. Store specimens in 4°C refrigerator or appropriate freezer. | viii. After extraction, specimens moved to pass-through window. |
| Part III | ix. Lab tech enters through entrance in PCR side of unit (positive pressure). |
| ix. Use sink for staining & washing of items. | x. Lab tech to put on lab coat from rack next to entrance, wash hands in sink, put on gloves. |
| x. Use laptop & counterpace to perform analyses and documentation. | xi. Receive samples from Glove Box room in pass-through window. |
| xi. Sterilize equipment by running autoclave. | xii. If necessary samples prepped in Laminar flow cabinet. |
| xii. Dispose of any biohazardous waste in biohazard waste container. | xiii. Appropriate diagnostics tests run. |
| xiii. Wash hands in sink. | xiv. Store specimens in 4°C refrigerator or appropriate freezer. |
| xiv. Hang lab coat back up on rack. | Part III |
| xv. Exit through same door. | xv. Use sink for staining & washing of items. |
| xvi. Use laptop & counterpace to perform analyses and documentation. | |
| xvii. Transfer vials into pass-through window to PCR room and sterilize equipment by running autoclave. | |
| xviii. Dispose of any biohazardous waste in biohazard waste container. | |
| xix. Wash hands in sink. | |
| xx. Exit through same entrance door. |
Table 1. Checklist for the PCR diagnostics workflow.
| Maintenance and calibrations | ||
| Real-time PCR systems | Monthly | Perform background calibrations every month |
| 18 months | Perform background, spatial and dye calibrations every 18th months | |
| Centrifuge | 1 year | Calibrate for revolutions per minute and temperature through external or internal calibration services |
| Glove Box | Daily | Visually inspect elements, particularly for damage to the exposed surfaces of the HEPA filters, gloves, o-rings and hoses. Make sure duct clamps are tight and in place. Perform leak pressure test. Test the pressure alarm. |
| 6 months | Change the HEPA filter | |
| 1 year | Calibrate the system | |
| Autoclave | Weekly | Clean the water tank and racks using a mild non-abrasive detergent |
| 3 months | Calibrate timer and gauges | |
| 1 year or every 50 cycles | Inspect, clean thoroughly, test and calibrate | |
| Refrigerator and Freeezer | 6 months | Check fan motor, evaporator coils, vacuuming condensing coils and condensor filters and replace batteries as needed |
| 1 year | Calibrate freezer through internal or external calibration services | |
Table 2. Real-time PCR equipment maintenance.
| Mandatory | Recommended |
| Lab coat, protective shoes, gloves | Lab coat, protective shoes, gloves, masks, eyewear |
| Refrigerator 4 °C, freezer -20 °C | Refrigerator 4 °C, freezer -20 °C, freezer -80 °C |
| One set of automated pipettes | Three sets of automated pipettes |
| Centrifuge, shaker, thermocycler | Robotic system |
| RT-PCR machine, ice bath | RT-PCR with temperature control, ice-free cooler |
| Biohazard waste bags | Autoclave to dispose biohazard waste |
Table 3. Minimum requirements for the RT-PCR respiratory virus diagnostic test BSL-2.
Discussion
The remote laboratory facility described above is logistically-oriented, expandable, rapidly deployable, multifunctional, and based on human-centered design concepts that have been geared to protect laboratory personnel and workspace efficiency. The detailed protocol for quick laboratory set-up and safe respiratory virus isolation and diagnosis was developed and presented.
For optimal equipment functioning, the following conditions must be maintained in the laboratory units: ambient temperature of 21 ± 2 °C, permissible temperature of 5 to 40 °C, humidity of 14 ± 5% RH, permissible maximum relative humidity of 80% RH (noncondensing), and an altitude between 0 and 2,000 m above sea level.
Energy consumption is one of the most important parameters for management of an off-grid laboratory. For core laboratory equipment, the power efficiency can differ 15-40%; however, average energy consumption is estimated here to deliver an appropriate service. The highest power rate (1,500-2,000 W) relates to the air conditioner, the glovebox system, the PCR machine, and the autoclave sterilizer. Considering 8 hours of intensive work carrying out the protocol and 16 hours of the laboratory environment control, the daily energy consumption of laboratory units is approximately 36 kWh/day for BSL-2, about 43 kWh/day for BSL-3, and 73 kWh/day for the connected BSL-2/BSL-3+ facilities. For a single unit, we recommend providing a source of electrical power with capacity of running/continuous power ≥8 kW, surge/starting power ≥10 kW; for the connected facility, running/continuous power ≥12 kW, and surge/starting power ≥14 kW. Note, in the BSL-3 laboratory facility, a backup energy source is strongly recommended to avoid accidental power outage and guarantee steady work of the glove box and negative pressure system during a diagnostic test.
A gasoline powered electric generator is a cost-effective solution for emergency energy supply. Assume that fuel efficiency of a gasoline generator is approximately 1.5 gallons per hour at 100% load. Then, if the average daily energy consumption is 8 hours of 40% load and 16 hours of 10% load, the laboratory unit BSL-2 or BSL-3 requires 7-9 gallons of fuel per day, correspondingly, and the connected facility needs ~15 gal/day.
The remote laboratory units are designed to fit capabilities of off-grid solar panel systems. Solar panels do not require additional fuel and can be operated with high productivity in the tropical and subtropical regions of Africa, Asia and Latin America due to the high solar irradiation. Currently, one unit of a commercially available solar panel system allows a daily power usage of up to 44 kWh/day.
Regardless of the selected type of alternative electrical energy source, dirty electricity filters are strongly recommended and preinstalled in the laboratory facilities to improve power quality and to protect laboratory equipment. Keep the PCR system away from sources of strong and unshielded electromagnetic radiation because strong electromagnetic radiation may interfere with the proper operation of the device. It is also important do not use the PCR system near strong vibration sources, such as a centrifuge or pump because excessive vibration will affect instrument performance. The laboratory equipment may only be installed in an environment that has nonconductive pollutants, such as dust particles or wood chips. Ensure the room is away from any vents that could expel particulate material onto the instrument components.
The laboratory water usage depends on number of diagnostic tests running daily and number of laboratory technicians working in the facility. Nuclease free water is required for preparation of mixers during diagnostic procedure including extraction and PCR test and must be delivered in advance as other supplies and chemicals. At least 50 mL of nuclease free water is needed to run one diagnostic test; the required volume of nuclease free water depends on work load (i.e., on number of samples). Distilled water is needed to run the autoclave sterilizer. Autoclave water consumption in one cycle is 160-180 mL; the autoclave is recommended for daily use. Most of the plastics (tubes, pipette tips, etc.) are disposable, but some are re-usable and need to be washed (large containers, racks, etc.). Regular running water is used for washing hands between procedures and its minimal volume is estimated to be 15-20 L daily. The water needs to be pumped for pressure; sediment pre-filter system is recommended to protect the water appliances from the damaging effect of sediment and to improve the quality of running water.
For cold storage, at least one 5.1 cubic feet refrigerator (+4 °C) and one 4.9 cubic feet (-20 °C to -30 °C) freezer are required in each laboratory unit to store samples/ RNA.
Laboratory decontamination includes several levels: cleaning > antisepsis > disinfection > sterilization. Simple cleaning can be performed using soap and water while scrubbing with a gloved hand or brush. Antisepsis includes washing with liquid antimicrobial chemical in order to inhibit the growth and multiplication of germs. Alcohol solutions (70%) can be used as an antiseptic liquid. Disinfection is the application of a liquid chemical to eliminate nearly all pathogenic microorganisms (except bacterial spores) on work surfaces and equipment. Chemical exposure time, temperature, and concentration of disinfectant are important. Sodium hypochlorite solution (0.5%), or bleach, is an effective disinfectant on a large scale for surface purification and water purification. Ultraviolet germicidal irradiation is another method of disinfection. A germicidal lamp produces UV-C light and leads to the inactivation of bacteria and viruses. Sterilization employs a physical or chemical procedure to destroy all microbial life -- including highly resistant bacterial spores. Sterilization can be performed with an autoclave sterilizer.
All laboratory waste must be segregated at the point of generation. Place solid, non-sharp, infectious waste in leak-proof waste bags marked as biohazard. If generated waste is sharp, it must be placed in puncture-resistant containers. Collect potentially infectious liquid waste in properly labeled biohazard containers for liquids. Containers and bags should not be filled more than 2/3 the volume. The disposal of all bleach products must be sorted into their own designated waste bin. Laboratory waste must be handled gently to avoid generating aerosols and breakage of bags/containers. Collection bags/bins with biohazard waste must be sealed and external surfaces decontaminated after use with 0.5% sodium hypochlorite solution. Sterilize all laboratory waste in autoclave at 121 °C for 30 minutes prior to incineration. Refer to functioning manual for the proper use of an autoclave. If possible, add a chemical or biological indicator to the autoclave to ensure proper sterilization. All autoclaved solid and liquid waste must be clearly labeled as sterilized with the setting, date, time, and operator. The labeled waste must then be placed in a secure, separate area prior to incineration.
As expected, workflow of diagnostic test depends on the disease and specimen. If it is recommended for virus identification to collect blood samples (e.g., Ebola19), sample aliquots can be stored at -20 °C instead of -80 °C (necessary for respiratory viruses). It is always better to take more than one specimen when sampling from a patient than to subdivide specimens later. If possible, for each type of specimen at least two specimens must be taken in separate specimen tubes. Specimens must be sub-divided if additional sampling is not possible.
If alternative specimens cannot be stored at appropriate temperatures (e.g., no freezers are available), swabs should be stored in pure (100%) ethanol or 99% methylated spirit (methanol additives only). In this case, the swab tip must be put into a vial with 1-2 mL of ethanol. Note that such specimens are suitable only for PCR. Also, note that a well-established assay is necessary for each particular virus diagnosis8,23, and unknown virus samples must be sent to assigned laboratories for further investigations19,20,21.
Mandatory and recommended requirements to the list of laboratory equipment for respiratory virus diagnostic PCR tests must be recognized. Table 3 underscores basic and minimally advanced (recommended) equipment and requirements for the RT-PCR diagnostic test. For BSL-3 practice, extra negative pressure protection (e.g., glove box) of personnel is crucial and necessary.
The connected laboratory modules are preferable to increase the number of personnel involved in laboratory testing and speed up the time required for a single test. Replacing the time-consuming manual RNA extraction is possible with automated qPCR (e.g., QiaCube). While this instrument is cumbersome (width 65 cm, length 62 cm, height 86 cm), it can fit the mobile laboratory workspace after rearrangement of furniture in BSL-2 or BSL-3 units.
Future work will be focused on the development of augmented reality (AR) and virtual reality (VR) trainings. The AR/VR glasses will be used to provide an interactive platform to teach requisite skills needed to become a well-trained laboratory worker. Helpful tips to perform some of the difficult, multistep procedures in laboratory diagnostic tests will be included in the software guide. This approach to personnel training should improve the quality of diagnostic test performance and management in remote laboratory facilities, especially remote and resource constrained areas.
Disclosures
Baylor College of Medicine holds a U.S. provisional patent application for Mobile Clinics (U.S. Patent Application No. 15/523,126, # 620078924). The authors declare that they have no competing financial interest.
Acknowledgments
The content of this article does not necessarily reflect the views or policies of the US Department of Health and Human Services or of the institutions affiliated with the authors. This research was supported by Paul G. Allen Family Foundation "Enhanced Zero-Impact, Emergency Smart Pod". We deeply appreciate all the fruitful discussions and collaboration with the colleagues from Baylor College of Medicine, GSS Health, NASA's Johnson Space Center. We are sincerely thankful to Thermo Fisher Scientifics and its representatives for a loan of the RT-PCR machine, centrifuge, and automated pipettes to carry out a respiratory virus diagnostic test in the remote laboratory facility. The authors are thankful to Marta Storl-Desmond and Sidney Stephen Sorrell for their assistance in the manuscript preparation and videography.
Materials
| Name | Company | Catalog Number | Comments |
| Autoclave Sterilizer 'BioClave' | Benchmark Scientific, Edison, NJ, USA | B4000-16 | 16 liter, Benchtop, Dims: 22x17.5x15.7 in, Fully automatic, Extremely Compact |
| Barcode Scanner | Zebra Technologies ZIH Corp., Lincolnshire, IL, USA | Symbol LS2208 | Handheld, lightweight |
| Breaker Box Panelboard Enclosure | Square D (Schneider Electric), France | MH62WP | NEMA 3R/5/12, Dims: 20 W x 62 H x 6-1/2 in. D, Electrical distribution board |
| Centrifuge - Microcentrifuge 17,000 x g | Thermo Fisher Scientific, Carlsbad, CA, USA | 75002440 | Holds 24 x1.5 or 2 ml tubes, Dims: 8.9x9.6x13.8 in |
| Class II Biological Safety Cabinet | NuAire, Inc., Plymouth, MN, USA | NU-602-400 | 4 Ft. Class II Type A2 Cage Changing Biological Safety Cabinet, 12" Access Opening, HEPEX Pressure Duct |
| Class III Biological Safety Cabinet (Glove box) | Germfree Laboratories, Ormond Beach, FL, USA | Model #PGB-36, Serial #C-2937 | Glove box, Portable, 36", Class III BSC. Dims: 36x20x23.75 in, Includes 2 interior outlets |
| Cryo Coolers | VWR, Radnor, PA, USA | 414004-286 | 0.5 or 1.5 ml tube benchtop coolers |
| Freezer (30°C freezer) | Thermo Fisher Scientific, Carlsbad, CA, USA | Model ULT430A | To occupy 4.9 Cubic feet |
| Laminar Flow Cabinet | NuAire, Inc., Plymouth, MN, USA | NU-126-300 | 3 Ft. Vertical Laminar Airflow Cabinet, 8" Access Opening, HEPA filter supply, 99.99% |
| Mini Centrifuge | Thermo Fisher Scientific, Carlsbad, CA, USA | 75004061 | Dims: 4.1x5.0x6.0 in |
| Pipettes automated | VWR, Radnor, PA, USA | 05-403-151 | Pipet 4-pack (2.5,10, 100 and 1,000μL volume) |
| Pipettes automated 'Finnpipette' | Thermo Fisher Scientific, Carlsbad, CA, USA | 4700880 | Pipet 4-pack (2, 20, 200 and 1,000μL volume), Advanced Volume Gearing(AVG), Ultra durable |
| Power Generator | Cummins Power Generation, Minneapolis, MN, USA | C60 D6 | 60 kW, 60 Hz, 1 Phase, 120/240V, Diesel |
| Refrigerator | BioMedical Solutions, Inc., Stafford, TX, USA | BSI-HC-UCFS-0504W | Standard Undercounter Refrigerators & Freezers |
| Refrigerator | Thermo Fisher Scientific, Carlsbad, CA, USA | 05LRAETSA | To occupy 5.1 Cubic feet |
| RT-PCR machine 'Step-one plus' | Thermo Fisher Scientific, Carlsbad, CA, USA | 4376598 | Holds 96 samples, Dims: 9.7x16.8x20.2 in |
| Vortex Mix | Thermo Fisher Scientific, Carlsbad, CA, USA | 88880017TS | Dims: 6.1x8.3x3.3 in |
| Chemicals | |||
| AgPath-ID One-Step RT-PCR Reagents | Applied Biosystems, Foster City, CA, USA | 4387391 | |
| Ethanol Koptec Pure 200 Proof | Decon Labs, Inc., King of Prussia, PA, USA | V1001 | |
| Nuclease-free Water | Ambion, Inc., Carlsbad, CA, USA | AM9906 | |
| QIAamp Viral RNA Mini Kit | Qiagen, Hilden, Germany | 52906 | |
| SuperScript III Platinum One-Step qRT- PCR Kit | Invitrogen, Carlsbad, CA, USA | 11732-088 | |
| Disposable | |||
| 1 mL cryogenic tubes | Thermo Fisher Scientific, Carlsbad, CA, USA | 03-337-7X | |
| 1.5 mL tubes | VWR, Radnor, PA, USA | 10025-726 | |
| 10 µL Filter Tips | Neptune, VWR, Radnor, PA, USA | Neptune, BT10XLS3 | |
| 20 µL Filter Tips | Multimax, BioExpress, VWR, Radnor, PA, USA | MultiMax, P-3243-30X | |
| 200 µL Filter Tips | ART, Thermo Fisher Scientific, Carlsbad, CA, USA | ART, 2770 | |
| 1000 µL Filter Tips | Phenix Research Products, Candler, NC, USA | TS-059BR | |
| AB custom probes | Thermo Fisher Scientific, Carlsbad, CA, USA | N/A | Custom probes |
| Combitips | Eppendorf, Hauppauge, NY, USA | 89232-972 | |
| Integrated DNA Technology (IDT) custom probes and primer | IDT | N/A | Custom probes |
| MicroAmp Fast Optical 96-Well Reaction Plate | Thermo Fisher Scientific, Carlsbad, CA, USA | 490003-978 CS | |
| MicroAmp Fast Reaction Tubes (8 tubes/strip) | Thermo Fisher Scientific, Carlsbad, CA, USA | 4358293 | |
| MicroAmp Optical 8-Cap Strip | Thermo Fisher Scientific, Carlsbad, CA, USA | 4323032 | |
| MicroAmp Optical Adhesive Film | Thermo Fisher Scientific, Carlsbad, CA, USA | 4311971 | |
| Supplies | |||
| Biohazard waste bags | VWR, Radnor, PA, USA | 14220-046 | 20.3 x 30.5 cm Biohazard bags |
| Gloves | Denville Scientific, Holliston, MA, USA | G4162-250 | Small, meduim or large Nitrile or latex gloves |
| Lab coat | N/A | N/A | Customizable |
| Masks | VWR, Radnor, PA, USA | 414004-663 | Advanced protection mask |
| Protective shoes | N/A | N/A | Customizable |
References
- World Health Organization (WHO) Ebola Response Team. Ebola virus disease in West Africa - the first 9 months of the epidemic and forward projections. New England Journal of Medicine. 371 (2), 1481-1495 (2014).
- World Health Organization (WHO). Media Center: Ebola Virus Disease Fact Sheet No. 103. , http://www.who.int/mediacentre/factsheets/fs103/en/ (2014).
- Fauci, A. S., Morens, D. M. Zika Virus in the Americas - yet another arbovirus threat. New England Journal of Medicine. 374 (7), 601-604 (2016).
- Campos, G. S., Bandeira, A. C., Sardi, S. I. Zika virus outbreak, Bahia, Brazil. Emerging Infectious Diseases. 21 (10), 1885-1886 (2015).
- Aly, M., Elrobh, M., Alzayer, M., Aljuhani, S., Balkhy, H. Occurrence of the Middle East Respiratory Syndrome Coronavirus (MERS-CoV) across the Gulf Corporation Council countries: Four years update. PLoS ONE. 12 (10), e0183850 (2017).
- World Health Organization (WHO). Middle East respiratory syndrome coronavirus (MERS-CoV) - Oman. Media Center: Disease outbreak news. Mar 18. , http://www.who.int/mediacentre/factsheets/fs103/en (2018).
- Ducharme, J., Johnson, D. This flu map shows how the biggest influenza outbreak in years spread across the U.S. Time, Time Health: Public Health. , http://time.com/5108077/2018/ (2018).
- Gaglani, M., et al. Influenza vaccine effectiveness against 2009 pandemic influenza A(H1N1) virus differed by vaccine type during 2013-2014 in the United States. Journal of Infectious Diseases. 213 (10), 1546-1556 (2016).
- Gates, B. The next epidemic - lessons from Ebola. New England Journal of Medicine. 372 (15), 1381-1384 (2015).
- Mills, A. Health care systems in low- and middle-income countries. New England Journal of Medicine. 370 (15), 552-557 (2014).
- Wölfel, R., et al. Mobile diagnostics in outbreak response, not only for Ebola: a blueprint for a modular and robust field laboratory. Euro Surveillance. 20 (44), 30055 (2015).
- Connelly, S. Through innovation, education and collaboration, Baylor Global Initiatives seeks to transform health and patient care worldwide. TMC Pulse, Global Perspective. , http://www.tmcnews.org/2015/03/global-perspective/ (2015).
- Hersh, D. USAID funds Ebola 'smart pod' project. Federal Times. , https://www.federaltimes.com/govcon/2015/02/20/usaid-funds-ebola-smart-pod-project/ (2015).
- Waite, A. Emergency Smart Pods - Transforming Containers into Modern Medical Clinics. DipNote, U.S. Department of State Official Blog. , https://blogs.state.gov/stories/2018/04/02/en/emergency-smart-pods-transforming-containers-modern-medical-clinics (2018).
- Guide to US Department of Health and Human Services Regulations. , https://www.hhs.gov/ (2015).
- Center for Disease Control and Prevention (CDC). Website: Clean up after a Disaster. , https://www.cdc.gov/disasters/cleanup/index.html (2017).
- Flannery, B., et al. Enhanced genetic characterization of influenza A(H3N2) viruses and vaccine effectiveness by genetic group, 2014-2015. Journal of Infectious Diseases. 214 (7), 1010-1019 (2016).
- Spencer, S., et al. Factors associated with real-time RT-PCR cycle threshold values among medically attended influenza episodes. Journal of Medical Virology. 88 (4), 719-723 (2016).
- Cherpillod, P., et al. Ebola virus disease diagnosis by real-time RT-PCR: A comparative study of 11 different procedures. Journal of Clinical Virology. 77, 9-14 (2016).
- Dedkov, V. G., et al. Development and evaluation of a real-time RT-PCR assay for the detection of Ebola virus (Zaire) during an Ebola outbreak in Guinea in 2014-2015. Journal of Virological Methods. 228, 26-30 (2016).
- Cnops, L., et al. Developement, integration of a quantitative reverse-transcription polymerase chain reaction diagnostic test for Ebola virus on a molecular diagnostics platform. Journal of Infectious Diseases. 214 (3), S192 (2016).
- Keitel, W. A., et al. Rapid research response to the 2009 A(H1N1)pdm09 influenza pandemic (Revised). BMC Research Notes. 6, 177 (2013).
- Parsons, L. M., et al. Laboratory diagnosis of tuberculosis in resource-poor countries: challenges and opportunities. Clinical Microbiology Reviews. 24 (6), 314-350 (2011).
- Expandable Bicon Shelter. Commercial Manual. Sea Box. , Lab EPN-0019618, Glove EPN-0018924 (2019).
- Lab Safety. Operating the Glovebox. JoVE Science Education Database. , Cambridge, MA. (2018).
- World Health Organization (WHO). Collecting, preserving and shipping specimens for the diagnosis of avian influenza A(H5N1) virus infection. , http://www.who.int/ihr/publications/CDS_EPR_ARO_2006_1.pdf. (2006).
- Lorenz, T. C. Polymerase Chain Reaction: Basic Protocol Plus Troubleshooting and Optimization Strategies. Journal of Visualized Experiments. (63), e3998 (2012).